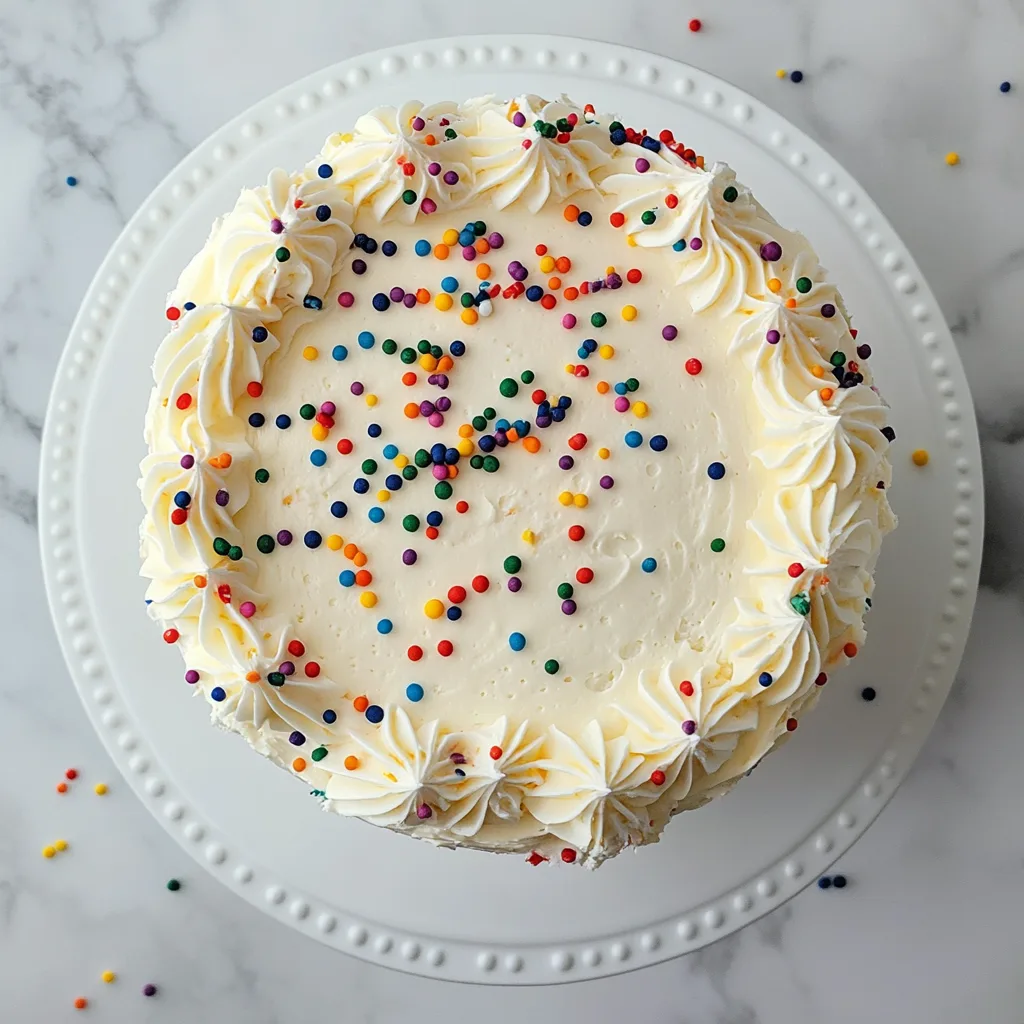
This Gluten-Free Vanilla Layer Cake with Buttercream Frosting is a game-changer for anyone who’s ever felt left out during birthday celebrations or special occasions. I still remember the first time I baked this for my niece’s birthday – the look of pure joy on her face when she realized she could actually eat the cake without worry was absolutely priceless. The delicate crumb, tender texture, and rich vanilla flavor rival any traditional cake, while the silky buttercream frosting adds that perfect touch of indulgence. If you’ve been searching for a gluten-free dessert that doesn’t compromise on taste, your search ends here. This recipe might just become your new go-to celebration cake, just like it has for my family.
Table of Contents
Recipe
Print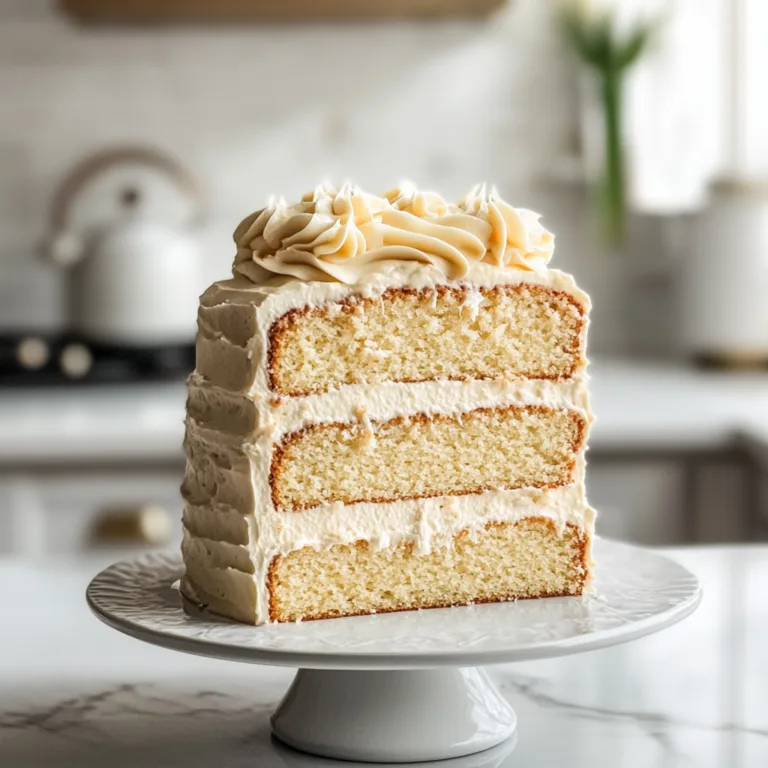
Delicious Gluten-Free Vanilla Layer Cake with Creamy Buttercream Frosting – Perfect for Every Occasion
This gluten-free vanilla layer cake is light, fluffy, and loaded with real vanilla flavor. Paired with a rich, silky buttercream frosting, it’s the perfect centerpiece for birthdays, celebrations, or any sweet moment worth savoring.
- Total Time: 50 minutes
- Yield: 12 servings 1x
Ingredients
**For the Cake:**
2 1/2 cups gluten-free all-purpose flour (with xanthan gum)
1 tbsp baking powder
1/2 tsp baking soda
1/2 tsp salt
1 cup unsalted butter, room temperature
1 3/4 cups granulated sugar
4 large eggs, room temperature
1 tbsp pure vanilla extract
1 cup buttermilk, room temperature
1/2 cup sour cream
**For the Buttercream Frosting:**
1 cup unsalted butter, room temperature
3 1/2 cups powdered sugar
2 tsp vanilla extract
2–3 tbsp milk or cream
Pinch of salt
Instructions
1. Preheat oven to 350°F (175°C). Grease and line two 8-inch cake pans.
2. In a medium bowl, whisk together flour, baking powder, baking soda, and salt.
3. In a large bowl, cream butter and sugar until light and fluffy (3–4 minutes).
4. Add eggs one at a time, beating well after each. Mix in vanilla.
5. Add dry ingredients in 3 parts, alternating with buttermilk and sour cream. Begin and end with dry ingredients.
6. Divide batter evenly between pans.
7. Bake for 28–32 minutes or until a toothpick comes out clean. Cool in pans 10 minutes, then transfer to racks to cool completely.
8. For the frosting: beat butter until creamy. Gradually add powdered sugar, mixing on low. Add vanilla, milk, and salt. Beat until smooth and fluffy.
9. Frost cooled cakes and decorate as desired.
Notes
Ensure all ingredients are room temperature for best texture.
You can bake this in a 9×13 pan for a sheet cake version.
Add sprinkles, berries, or jam between layers for a twist!
- Prep Time: 20 minutes
- Cook Time: 30 minutes
- Category: Dessert, Cake, Gluten-Free
- Method: Baking
- Cuisine: American
Nutrition
- Serving Size: 1 slice
- Calories: 480
- Sugar: 38g
- Sodium: 240mg
- Fat: 24g
- Saturated Fat: 15g
- Unsaturated Fat: 8g
- Trans Fat: 0g
- Carbohydrates: 58g
- Fiber: 1g
- Protein: 5g
- Cholesterol: 95mg
Keywords: gluten-free vanilla cake, buttercream layer cake, gluten-free celebration cake, birthday cake recipe
Why You’ll Love This Gluten-Free Vanilla Layer Cake with Buttercream Frosting
Perfect Texture Without Gluten
The secret to this cake’s incredible texture lies in the careful blend of gluten-free flours. I’ve tested countless combinations to achieve that elusive tender crumb that doesn’t fall apart or feel gritty. The addition of xanthan gum provides the structure that gluten normally would, while a touch of almond flour adds moisture and prevents that dreaded dryness that plagues many gluten-free bakes. The result is a cake so soft and fluffy, your guests will never guess it’s gluten-free – I’ve fooled even the most discerning cake connoisseurs at family gatherings!
Flavor That Doesn’t Compromise
Let’s talk flavor – because gluten-free shouldn’t mean taste-free! This cake features real vanilla bean seeds for an authentic, aromatic vanilla experience that artificial extracts simply can’t match. The buttercream frosting is silky smooth with the perfect balance of sweetness and buttery richness. I’ve found that using high-quality butter makes a noticeable difference here, creating a frosting that’s luxurious without being cloyingly sweet. The combination of the tender vanilla cake layers and velvety frosting creates a harmonious flavor profile that will have everyone asking for seconds.
Essential Tips & Tricks
Mastering the Mixing Method
When it comes to gluten-free baking, the mixing technique matters tremendously. Unlike traditional cakes where overmixing develops gluten (making them tough), gluten-free batters need thorough mixing to activate the xanthan gum properly. I recommend using a stand mixer on medium speed for at least 3 minutes to incorporate air and create structure. Another game-changing tip: let your ingredients come to room temperature before starting. Cold eggs or butter can cause the batter to separate or bake unevenly. Trust me, this extra preparation step makes all the difference in achieving that perfect rise and texture.
The Right Temperature and Timing
Temperature control is critical for gluten-free success! I’ve learned (through many failed attempts) that gluten-free cakes benefit from a slightly lower oven temperature than their traditional counterparts. Baking at 325°F instead of 350°F allows for more even baking without drying out the edges. For a truly decadent dessert experience similar to my Hot Chocolate Poke Cake with Whipped Marshmallow Frosting, don’t rush the cooling process. Let your cake layers cool completely before frosting – ideally for at least an hour – to prevent the buttercream from melting or the cake from crumbling.
Serving Ideas & Creative Variations
Seasonal Adaptations
This versatile cake base welcomes seasonal twists throughout the year. In summer, try adding fresh lemon zest to the batter and folding in blueberries for a bright, fruity variation. Fall calls for warming spices like cinnamon and nutmeg, perhaps with a maple buttercream instead of vanilla. During winter holidays, a touch of peppermint extract in the frosting creates a festive treat. The beauty of this recipe is its adaptability – I’ve even transformed it into cupcakes for my daughter’s school events. For another gluten-free treat perfect for any season, check out these delicious Gluten-Free Brownies with Fudgy Centers.
Decoration Inspiration
Even a simple cake becomes extraordinary with thoughtful decoration. For elegant simplicity, try a naked cake approach with minimal frosting on the sides and fresh flowers on top. For birthdays, a drip effect using melted white chocolate tinted with food coloring creates a stunning visual. My personal favorite is creating an ombré effect with the buttercream, gradually deepening the color from top to bottom. Don’t forget that texture adds interest too – try pressing crushed gluten-free cookies, toasted coconut, or chopped nuts onto the sides for a professional-looking finish that adds delightful crunch.
Storage & Troubleshooting Guide
Keeping Your Cake Fresh
Gluten-free cakes have different storage needs than their wheat-based counterparts. They tend to dry out faster, so proper storage is essential for maintaining that perfect moist texture. For short-term storage (1-2 days), keep your frosted cake under a cake dome at room temperature. For longer storage, individual slices can be wrapped tightly in plastic wrap and frozen for up to 3 months. The key trick I’ve discovered: brush each layer with a simple syrup before frosting. This locks in moisture and keeps the cake fresh days longer than it would otherwise stay – a game-changer for make-ahead situations!
Fixing Common Problems
Even experienced bakers encounter issues sometimes! If your cake layers sink in the middle, your batter might have been too wet or your oven temperature too high. The solution: reduce liquid slightly or check your oven with a thermometer. For crumbly texture, try adding an extra egg next time or increasing the xanthan gum by ¼ teaspoon. If your frosting separates or looks curdled, it’s likely a temperature issue – usually ingredients at different temperatures. The fix is simple: continue beating on high speed until it comes back together, or gently warm the bowl over simmering water for a few seconds.
Frequently Asked Questions
Can I make this cake dairy-free as well as gluten-free?
Yes! Substitute the butter with dairy-free sticks (not tub margarine) and use coconut milk or almond milk instead of regular milk for excellent results.
How far in advance can I make this Gluten-Free Vanilla Layer Cake with Buttercream Frosting?
The unfrosted cake layers can be made 2 days ahead and wrapped well, or frozen for up to 1 month. Frost the day before or day of serving.
Why did my cake turn out gritty?
Rice flour can sometimes cause grittiness. Use superfine rice flour or let your batter rest 30 minutes before baking to allow the flours to hydrate properly.
Can I use a pre-made gluten-free flour blend?
Absolutely! Look for one with xanthan gum already included. Bob’s Red Mill 1-to-1 and King Arthur Measure for Measure work particularly well.
How do I prevent my cake layers from sticking to the pans?
Line the bottoms with parchment paper circles and grease the sides well. For extra insurance, dust with a little gluten-free flour or cornstarch.
Final Thoughts
This Gluten-Free Vanilla Layer Cake with Buttercream Frosting proves that dietary restrictions don’t mean sacrificing celebration-worthy desserts. The journey to perfecting this recipe taught me that gluten-free baking isn’t about limitation—it’s about creativity and precision. Every time I serve this cake, I’m reminded that food brings people together, regardless of dietary needs. Whether it’s for a birthday, anniversary, or simply because you deserve something special, this cake delivers pure joy with every bite. For more inspiration, check out my Pinterest for additional gluten-free dessert ideas that never compromise on flavor.