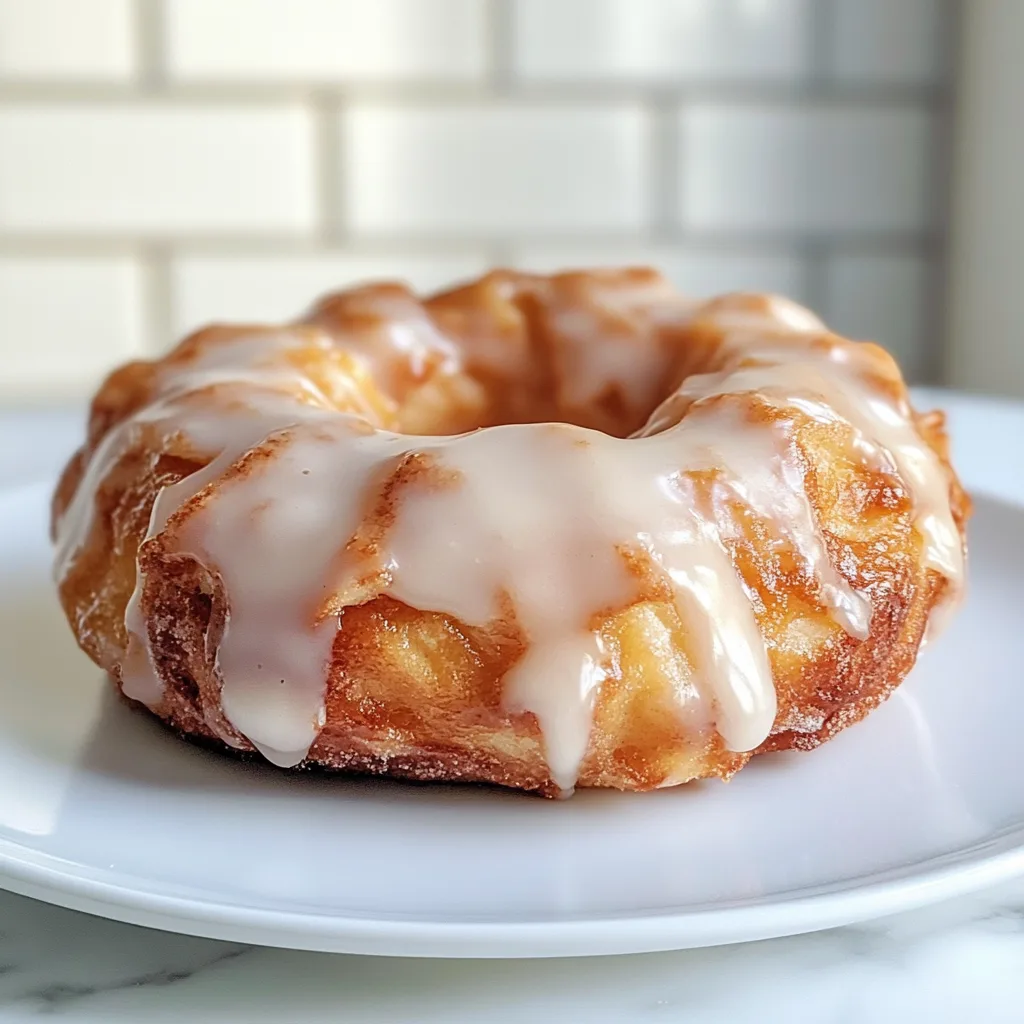
Baked Apple Fritter Donut Bread with Vanilla Icing transforms your kitchen into a bakery with just one pan! The aroma of cinnamon-spiced apples and warm vanilla brings back memories of Saturday mornings at my grandmother’s house, where the scent of fresh baked goods would gently wake us. This loaf combines the comforting flavors of a classic apple fritter with the convenience of a quick bread. Each slice delivers pockets of tender apples, a hint of cinnamon, and that irresistible sweet glaze that makes you close your eyes with each bite. Perfect for brunch gatherings or alongside your morning coffee, this bread will become your new favorite way to enjoy apple season.
Table of Contents
Recipe
Print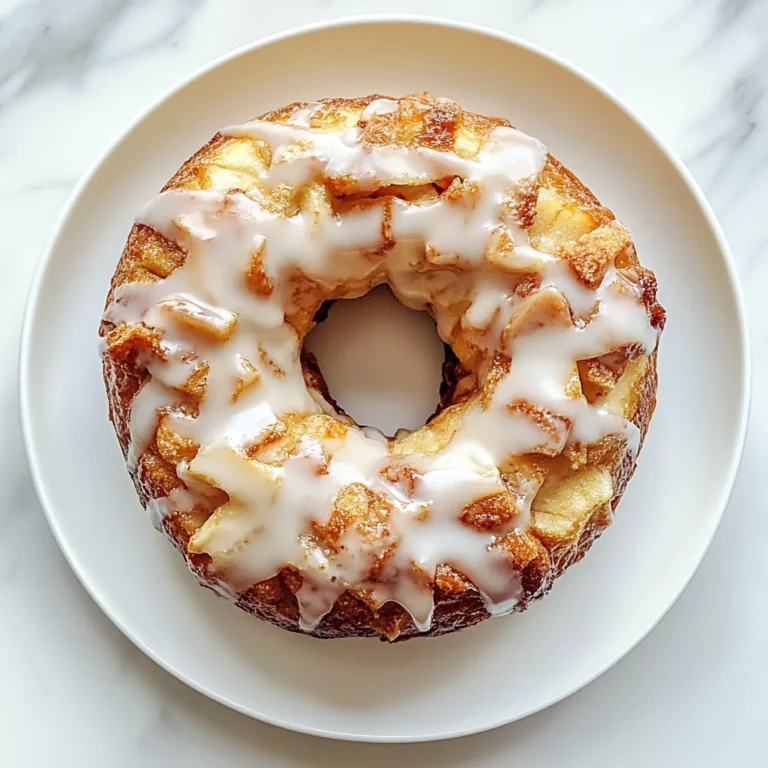
Delicious Baked Apple Fritter Donut Bread with Creamy Vanilla Icing Recipe
This baked apple fritter donut bread is soft, moist, and bursting with cinnamon-sugar apple chunks. Drizzled with a creamy vanilla icing, it delivers all the flavor of a classic apple fritter in an easy-to-bake loaf format. Perfect for breakfast, dessert, or a cozy fall treat.
- Total Time: 1 hour 10 minutes
- Yield: 1 loaf (8 slices) 1x
Ingredients
🍏 Apple Filling:
2 medium apples, peeled and diced (Granny Smith or Honeycrisp)
1 1/2 tsp cinnamon
2 tbsp granulated sugar
🍞 Bread Batter:
1/2 cup unsalted butter, softened
2/3 cup granulated sugar
2 eggs
1 1/2 tsp vanilla extract
1 1/2 cups all-purpose flour
1 3/4 tsp baking powder
1/2 cup milk
🍮 Cinnamon Sugar Swirl:
1/3 cup brown sugar
1 tsp ground cinnamon
🍦 Vanilla Icing:
1/2 cup powdered sugar
1 tbsp milk (more if needed)
1/4 tsp vanilla extract
Instructions
1. Preheat oven to 350°F (175°C). Grease and line a 9×5 loaf pan with parchment paper.
2. In a small bowl, toss diced apples with 2 tbsp sugar and 1 1/2 tsp cinnamon. Set aside.
3. In a large bowl, cream together butter and granulated sugar until fluffy. Add eggs one at a time, then mix in vanilla.
4. In another bowl, whisk flour and baking powder. Gradually mix into the wet ingredients, alternating with milk until smooth.
5. In a separate bowl, mix brown sugar and cinnamon for the swirl.
6. Pour half the batter into the prepared loaf pan. Layer with half the apples and half the cinnamon sugar. Repeat layers with remaining batter, apples, and swirl.
7. Use a knife to gently swirl through the batter once or twice.
8. Bake for 50–60 minutes or until a toothpick inserted in the center comes out clean.
9. Let cool in pan for 15 minutes, then transfer to a wire rack.
10. Whisk icing ingredients until smooth. Drizzle over cooled bread.
11. Slice and enjoy!
Notes
Store in an airtight container at room temp for 2–3 days or refrigerate for up to 5 days.
Best enjoyed slightly warmed with a hot cup of coffee or tea.
You can use other firm apples like Fuji or Pink Lady.
- Prep Time: 15 minutes
- Cook Time: 55 minutes
- Category: Breakfast, Dessert
- Method: Baking
- Cuisine: American
- Diet: Vegetarian
Nutrition
- Serving Size: 1 slice
- Calories: 310
- Sugar: 26g
- Sodium: 180mg
- Fat: 14g
- Saturated Fat: 8g
- Unsaturated Fat: 5g
- Trans Fat: 0g
- Carbohydrates: 43g
- Fiber: 2g
- Protein: 4g
- Cholesterol: 60mg
Keywords: apple fritter bread, baked donut bread, apple cinnamon loaf, fall breakfast, cinnamon apple dessert
Why You’ll Love This Baked Apple Fritter Donut Bread with Vanilla Icing
A Perfect Balance of Textures and Flavors
The magic of this bread lies in its incredible texture contrast. The exterior develops a slight crispness reminiscent of a donut’s edge, while the interior stays tender and moist. Chunks of apples create pockets of juicy sweetness throughout, giving you that perfect apple fritter experience. I love how the cinnamon and nutmeg warm up the flavor profile, creating depth that store-bought versions simply can’t match. The vanilla icing seeps slightly into the warm bread, creating a glaze that’s neither too sweet nor too subtle – just perfectly balanced for that authentic donut shop experience.
Simple Ingredients, Extraordinary Results
What makes this recipe truly special is how everyday ingredients transform into something extraordinary. You likely have most items already in your pantry – flour, sugar, eggs, and apples. The magic happens in how they come together. I remember being shocked at how simple the process was my first time making it. No complicated techniques or specialty equipment needed! Just mix, fold, bake, and glaze. The recipe is forgiving enough for beginners yet delivers results that will impress even your most discerning friends. The vanilla icing adds that final touch of sweetness that elevates it from bread to treat.
Essential Tips & Tricks
Choosing and Preparing Your Apples
The apple selection makes a significant difference in your final bread. I prefer Granny Smith for their tartness and firm texture that holds up during baking, but Honeycrisp and Braeburn work beautifully too. Dice them into small, uniform pieces – about 1/4 inch cubes – for even distribution and cooking. Don’t peel them unless you prefer; the skin adds lovely color and texture. Tossing the diced apples with a bit of lemon juice prevents browning and adds a subtle brightness that balances the sweetness. This technique is similar to what I use in my Creamy Rice Pudding with Cinnamon and Raisins, where balance is everything.
Perfecting Your Vanilla Icing
The icing consistency is crucial – too thick and it won’t spread; too thin and it disappears into the bread. Start with less liquid than you think you need, then add more a few drops at a time. Wait until your bread has cooled for at least 20 minutes before glazing. I like to place the bread on a wire rack with parchment paper underneath for easy cleanup. For an extra touch of luxury, add a tiny pinch of salt to the icing – it enhances the vanilla flavor and balances the sweetness. Real vanilla extract makes a noticeable difference here, so save the imitation for other recipes.
Serving Ideas & Creative Variations
Seasonal Adaptations
This versatile bread welcomes seasonal twists that keep it exciting year-round. In fall, add a tablespoon of pumpkin puree and swap in pumpkin pie spice. Winter holidays call for cranberries and orange zest folded into the batter. Spring feels fresh with lemon zest and blueberries replacing some of the apples. Summer brings opportunities for peach or nectarine additions that create a completely different but equally delicious experience. I’ve even added a handful of chopped walnuts for texture and nutty depth – reminiscent of my Sticky Toffee Date Pudding but with a fruitier profile.
Elegant Entertaining Presentations
Transform this humble bread into a showstopping dessert with thoughtful presentation. Slice it thick and toast lightly, then top with a scoop of vanilla ice cream and caramel drizzle for an elevated dessert. For brunch gatherings, create a bread board with slices arranged alongside fresh fruit, cheese, and honey. Individual portions work beautifully too – bake in mini loaf pans and wrap with parchment and twine for homemade gifts. For special occasions, double the icing and apply in two layers, allowing the first to set before adding the second for a bakery-worthy finish.
Storage & Troubleshooting Guide
Keeping Your Bread Fresh
This bread maintains its optimal texture for up to three days when stored properly. Once completely cooled, wrap it tightly in plastic wrap or store in an airtight container at room temperature. If you need longer storage, refrigeration extends freshness to about five days, though the texture becomes slightly more dense. For longer-term storage, freeze individual slices wrapped in plastic and foil – they’ll keep for up to three months. To revive slightly stale bread, warm a slice in the microwave for 10-15 seconds or toast lightly and add a fresh drizzle of homemade vanilla icing.
Solving Common Baking Issues
If your bread develops a sunken middle, your leavening agents might need refreshing, or your oven temperature might be inaccurate. Check both before your next bake. For bread that’s browning too quickly but remains underbaked inside, loosely tent with foil halfway through baking. If your apples sink to the bottom, try tossing them in a tablespoon of the dry ingredient mixture before folding into the batter. For icing that won’t set properly, the bread might have been too warm during application. Patient cooling yields the best results, creating that perfect crackly glaze that makes this bread irresistible.
Frequently Asked Questions
Can I make Baked Apple Fritter Donut Bread with Vanilla Icing ahead of time?
Absolutely! Bake it up to two days ahead and add the icing just before serving for the freshest taste and appearance.
What apples work best in this recipe?
Firm, tart varieties like Granny Smith, Honeycrisp, or Pink Lady hold their shape during baking and balance the sweetness perfectly.
Can I substitute the all-purpose flour?
Yes, a 1:1 gluten-free baking blend works well, though the texture will be slightly different. Whole wheat pastry flour can replace up to half the amount.
How do I know when the bread is done baking?
A toothpick inserted in the center should come out with a few moist crumbs but no wet batter. The top will be golden brown.
Can I freeze leftovers?
Definitely! Wrap individual slices tightly and freeze for up to three months. Thaw at room temperature or microwave briefly to enjoy.
Final Thoughts
This Baked Apple Fritter Donut Bread with Vanilla Icing brings together the best of both worlds – the comforting flavors of a classic apple fritter and the convenience of a quick bread. I find myself returning to this recipe whenever I need something special yet simple to share with loved ones. The way it fills your home with warmth and sweetness makes the baking process almost as rewarding as the eating. Whether you’re enjoying a slice with your morning coffee or serving it as a dessert with a scoop of vanilla ice cream, this bread creates moments of pure joy. For more delicious inspiration, visit my Pinterest board where I share favorite recipes and baking ideas.