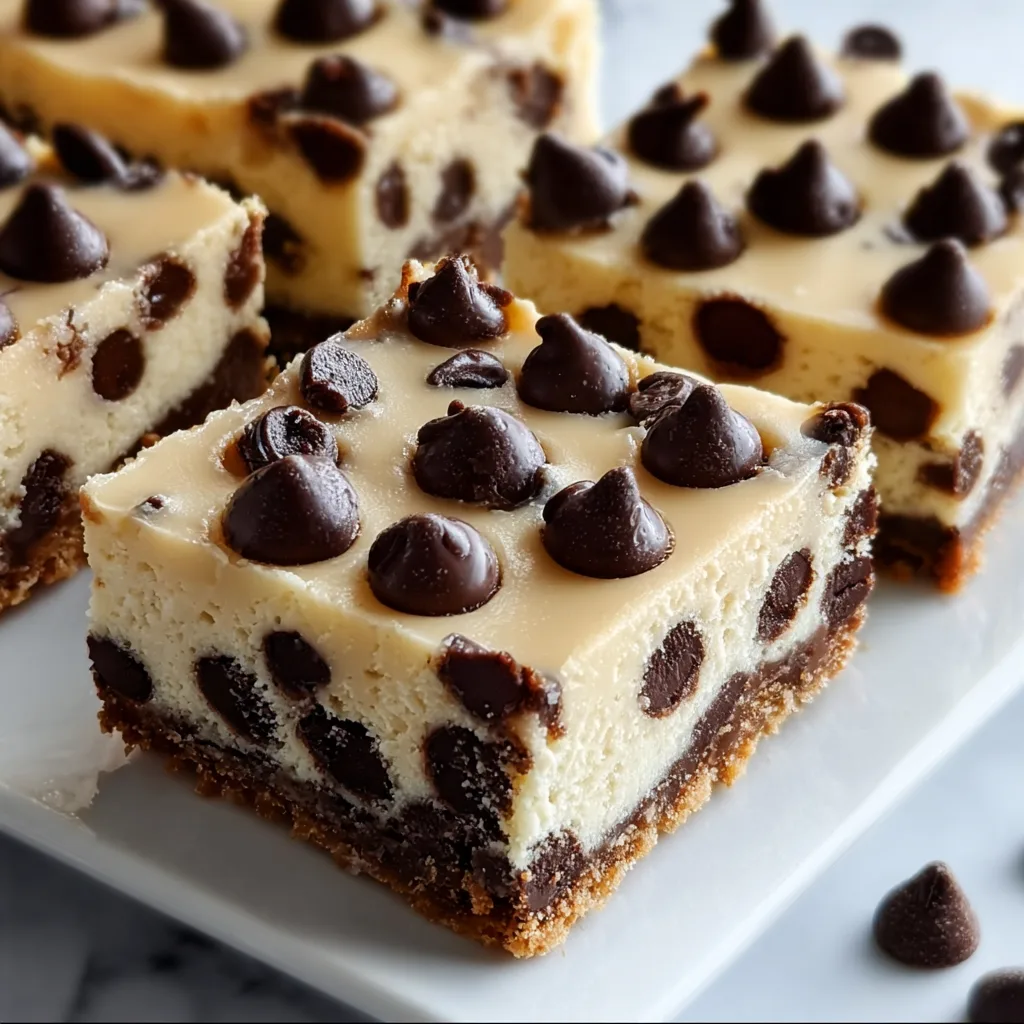
Cheesecake Bars with Chocolate Chips combine two of my greatest dessert loves – creamy cheesecake and rich chocolate chips – into one irresistible treat that’s easier than making a traditional cheesecake. These bars strike the perfect balance between tangy cream cheese and sweet chocolate in every bite. I first made these for my sister’s birthday when I was short on time but wanted something special. The look on her face when she tasted that first bite told me everything I needed to know – these were destined to become a family favorite. If you enjoy the classic flavor combination in my Easy Strawberry Cheesecake Crunch Bars, you’ll adore this chocolate chip version.
Table of Contents
Recipe
Print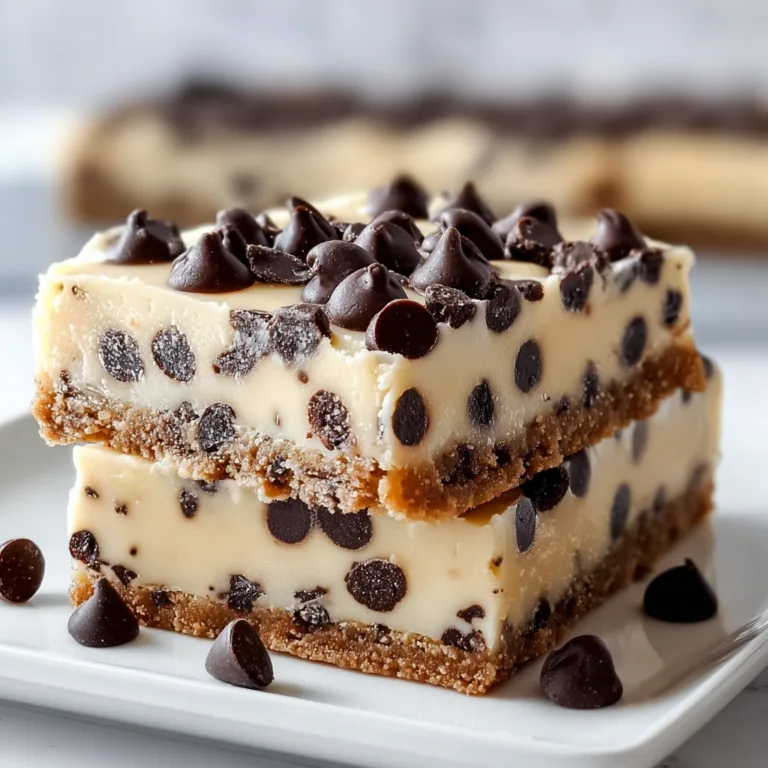
Delicious Cheesecake Bars with Chocolate Chips Recipe
These cheesecake bars with chocolate chips are irresistibly creamy and easy to make. With a graham cracker crust, smooth vanilla cheesecake filling, and melty chocolate chips in every bite, they’re a crowd-pleasing dessert for any occasion.
- Total Time: 5 hrs (includes chilling)
- Yield: 12 bars 1x
Ingredients
For the crust:
1 1/2 cups graham cracker crumbs
1/4 cup granulated sugar
1/2 cup melted butter
For the filling:
16 oz cream cheese, softened
2/3 cup granulated sugar
2 large eggs
1 tsp vanilla extract
1/4 cup sour cream
1 cup semi-sweet chocolate chips (divided)
Instructions
1. Preheat oven to 325°F (160°C). Line an 8×8-inch baking pan with parchment paper.
2. Mix graham cracker crumbs, sugar, and melted butter. Press firmly into the bottom of the pan. Bake for 10 minutes and cool slightly.
3. In a bowl, beat cream cheese and sugar until smooth. Add eggs one at a time, mixing well after each.
4. Mix in vanilla and sour cream until just combined.
5. Fold in 3/4 cup chocolate chips. Pour batter over crust and spread evenly.
6. Sprinkle remaining chocolate chips on top.
7. Bake for 35–40 minutes or until center is just set. Cool completely, then chill for at least 4 hours before slicing.
8. Serve chilled for best texture.
Notes
Use mini chocolate chips for more even distribution.
Add a drizzle of melted chocolate or caramel before serving for extra indulgence.
Store leftovers in the refrigerator for up to 5 days.
- Prep Time: 15 mins
- Cook Time: 40 mins
- Category: Dessert
- Method: Baking
- Cuisine: American
- Diet: Vegetarian
Nutrition
- Serving Size: 1 bar
- Calories: 320
- Sugar: 22g
- Sodium: 180mg
- Fat: 22g
- Saturated Fat: 12g
- Unsaturated Fat: 9g
- Trans Fat: 0g
- Carbohydrates: 26g
- Fiber: 1g
- Protein: 5g
- Cholesterol: 70mg
Keywords: cheesecake bars, chocolate chip cheesecake, easy dessert bars, creamy cheesecake recipe
Why You’ll Love This Cheesecake Bars with Chocolate Chips
Perfect Balance of Flavors and Texture
These cheesecake bars offer the ideal balance of sweet and tangy in every bite. The buttery graham cracker crust provides a wonderful textural contrast to the silky-smooth cheesecake filling. What makes these truly special is how the chocolate chips create little pockets of rich chocolate throughout the bars. Some chips melt completely, creating chocolate swirls, while others maintain their shape for that satisfying chocolate chunk experience. I love how the slightly crunchy crust gives way to that velvety center – it’s a textural journey that makes these bars completely irresistible.
Easier Than Traditional Cheesecake
If you’ve ever been intimidated by making a full cheesecake, these bars are your perfect solution. There’s no water bath required, and you don’t need to worry about cracks on the surface! The rectangular shape means even baking and perfect portions every time. I especially appreciate how forgiving this recipe is for beginners – the bars set beautifully without the fussiness of traditional cheesecake. Plus, the shorter baking time means less waiting around. I can whip these up on a weeknight when I’m craving something special but don’t have hours to spend in the kitchen.
Essential Tips & Tricks
Perfecting Your Ingredients
Starting with room temperature ingredients is absolutely crucial for achieving that silky-smooth texture. Cold cream cheese will leave lumps no matter how long you beat it! I like to set my cream cheese, eggs, and sour cream out at least an hour before mixing. For the chocolate chips, I recommend using high-quality semi-sweet chips that hold their shape while baking. Mini chocolate chips distribute more evenly throughout the batter, but standard chips create more dramatic chocolate pockets. Don’t skimp on the vanilla extract – a good quality pure vanilla makes a noticeable difference in the final flavor.
Mastering the Technique
The key to perfect cheesecake bars lies in how you mix and bake them. Beat the cream cheese until completely smooth before adding other ingredients, but avoid overmixing once the eggs are added (this introduces air that can cause cracks). For the perfect crust, press it firmly into the pan using the bottom of a measuring cup. When checking for doneness, look for a slight jiggle in the center – the bars will continue to set as they cool. If you love the texture in my Fluffy Japanese Cotton Cheesecake, you’ll appreciate how these bars achieve that perfect consistency with less effort.
Serving Ideas & Creative Variations
Elegant Presentation Options
Transform these simple bars into an impressive dessert with thoughtful presentation. Cut them into perfect squares using a hot knife (run under hot water, then wipe dry between cuts). For special occasions, dust with powdered sugar or drizzle with melted chocolate just before serving. I love arranging them on a wooden board surrounded by fresh berries and mint leaves for a pop of color. Individual bars can be placed in cupcake liners for easy serving at parties. Consider adding a dollop of whipped cream and a chocolate-covered espresso bean on top for a coffee shop vibe that guests will rave about.
Flavor Twists and Add-Ins
The basic recipe is wonderfully versatile and welcomes creative adaptations. Try swapping regular chocolate chips for white chocolate, butterscotch, or peanut butter chips for a completely different flavor profile. Adding 1-2 tablespoons of espresso powder creates a sophisticated mocha version that coffee lovers adore. For a fruity twist, fold in 1/2 cup of fresh raspberries along with the chocolate chips – the tartness complements the sweet chocolate beautifully. If you enjoy the flavor combinations in my Salted Caramel Pretzel Cheesecake Balls, try adding a pretzel crust and caramel drizzle to these bars.
Storage & Troubleshooting Guide
Proper Storage Methods
These cheesecake bars maintain their quality when stored correctly. Keep them in an airtight container in the refrigerator for up to 5 days, separating layers with parchment paper to prevent sticking. For longer storage, these bars freeze beautifully for up to 3 months. I recommend cutting them into individual portions before freezing, then wrapping each piece in plastic wrap and storing in a freezer bag. This allows you to thaw only what you need. For best flavor, let frozen bars thaw overnight in the refrigerator, then bring to room temperature for about 20 minutes before serving.
Fixing Common Issues
Even experienced bakers occasionally encounter challenges with cheesecake bars. If your bars develop cracks, don’t worry – a simple topping like chocolate ganache or whipped cream can hide imperfections beautifully. For a soggy crust, try baking the crust alone for 5-8 minutes before adding the filling. If your bars are too soft in the center, they likely need more cooling time – refrigerate for at least 4 hours or preferably overnight. Uneven chocolate distribution can be prevented by tossing the chips in a small amount of flour before folding into the batter, which helps them stay suspended throughout the filling.
Frequently Asked Questions
Can I make Cheesecake Bars with Chocolate Chips without a springform pan?
Absolutely! A regular 9×13 baking pan lined with parchment paper works perfectly. The parchment creates handles for easy removal after cooling.
How do I know when the bars are fully baked?
The edges should be set while the center still has a slight jiggle. They’ll continue firming up during cooling.
Can I substitute Greek yogurt for sour cream?
Yes! Full-fat Greek yogurt makes an excellent substitute with a similar tangy flavor and creamy texture.
Why did my chocolate chips sink to the bottom?
Tossing chips in 1 tablespoon of flour before folding them in helps prevent sinking during baking.
How far in advance can I make these for a party?
These bars actually improve with time! Make them 1-2 days ahead and refrigerate for the best flavor and texture.
Final Thoughts
These Cheesecake Bars with Chocolate Chips have become my go-to dessert when I want to impress without spending hours in the kitchen. The perfect balance of creamy cheesecake and chocolate indulgence makes them universally appealing. What I love most is their versatility – dress them up for elegant gatherings or keep them casual for family dessert. The way the chocolate chips create little pockets of sweetness throughout the creamy filling creates a dessert that feels both familiar and special. Find more inspiration for your baking adventures on my Pinterest board where I’m always adding new ideas!