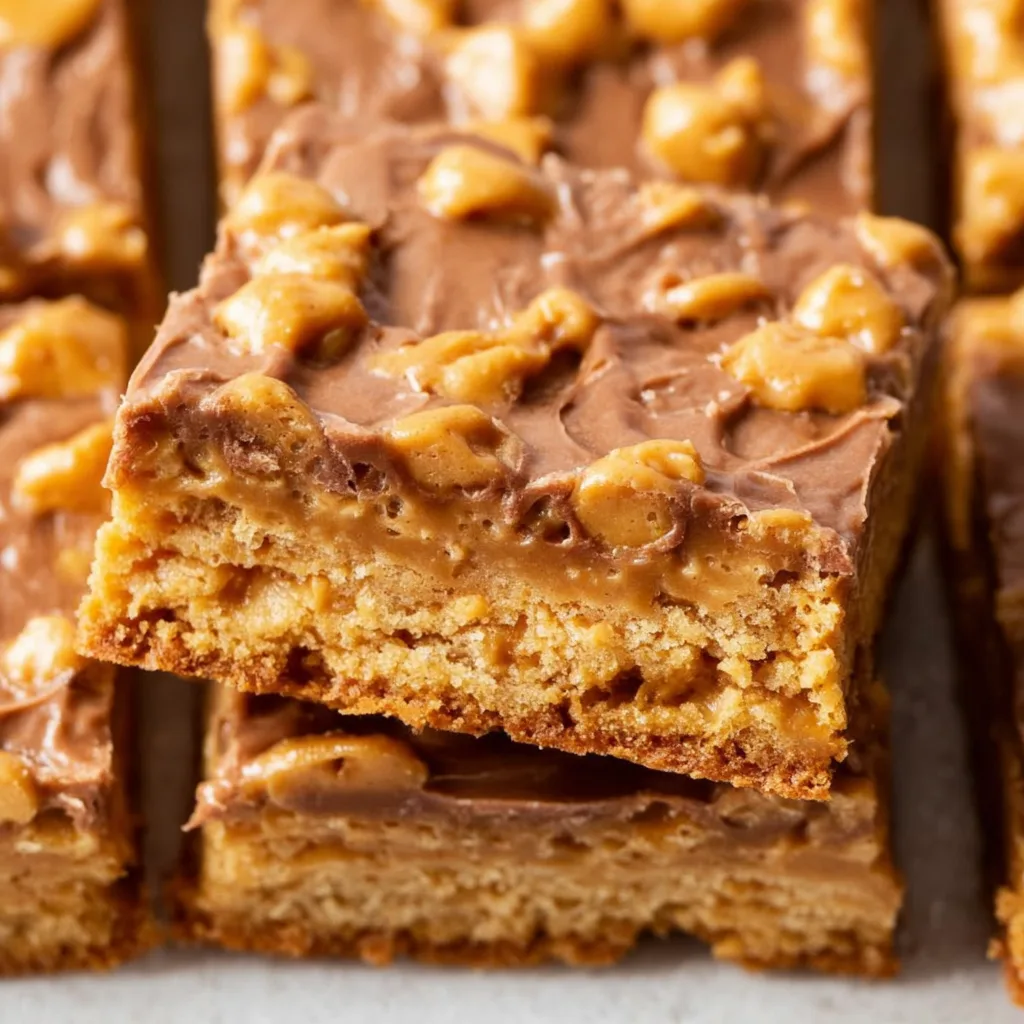
Classic Peanut Butter Lunch Lady Cookie Bars bring me right back to elementary school cafeteria days, but trust me—these homemade versions are infinitely better than the originals! These nostalgic treats feature a buttery, soft cookie base loaded with peanut butter flavor, topped with a silky layer of peanut butter frosting that melts in your mouth. I still remember the first time I recreated these at home; my kitchen filled with that unmistakable warm, nutty aroma that had my family hovering nearby like hungry school children at lunchtime. Just like my Hot Honey Chicken Cutlets, these bars strike that perfect balance between comfort and indulgence.
Table of Contents
Recipe
Print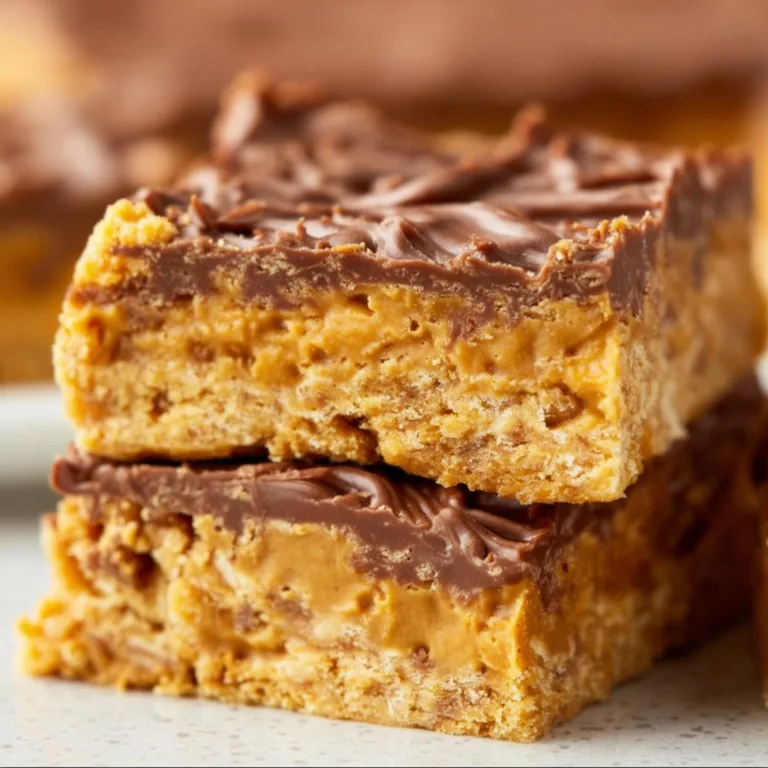
Classic Peanut Butter Lunch Lady Cookie Bars Recipe
These Classic Peanut Butter Lunch Lady Cookie Bars are soft, chewy, and topped with a rich peanut butter glaze. A nostalgic and easy dessert that’s perfect for snacks, parties, or lunchbox treats.
- Total Time: 30 minutes
- Yield: 12 bars 1x
Ingredients
For the Bars:
1/2 cup butter (softened)
1 cup sugar
1/2 cup peanut butter
2 eggs
1 teaspoon vanilla extract
1 1/2 cups flour
1 teaspoon baking soda
1/4 teaspoon salt
For the Peanut Butter Glaze:
1/4 cup peanut butter
2 tablespoons butter
1 cup powdered sugar
2–3 tablespoons milk
Optional:
Chopped peanuts for topping
Instructions
1. Preheat oven to 180°C (350°F) and line a baking dish.
2. In a bowl, cream butter, sugar, and peanut butter until smooth.
3. Add eggs and vanilla, mix well.
4. Stir in flour, baking soda, and salt until combined.
5. Spread batter evenly in the prepared dish.
6. Bake for 18–20 minutes until lightly golden.
7. In a saucepan, melt peanut butter and butter for the glaze.
8. Remove from heat and whisk in powdered sugar and milk until smooth.
9. Spread glaze over warm bars.
10. Let set before slicing and serving.
Notes
Do not overbake to keep bars soft.
Adjust milk for glaze consistency.
Let bars cool slightly before cutting.
Store in an airtight container up to 4 days.
- Prep Time: 10 minutes
- Cook Time: 20 minutes
- Category: Dessert
- Method: Baking
- Cuisine: American
- Diet: Vegetarian
Nutrition
- Serving Size: 1 bar
- Calories: 280
- Sugar: 18 g
- Sodium: 160 mg
- Fat: 16 g
- Saturated Fat: 6 g
- Unsaturated Fat: 8 g
- Trans Fat: 0 g
- Carbohydrates: 28 g
- Fiber: 1 g
- Protein: 6 g
- Cholesterol: 55 mg
Keywords: peanut butter lunch lady bars, peanut butter cookie bars, easy peanut butter dessert, school cafeteria cookies, soft peanut butter bars
Why You’ll Love These Classic Peanut Butter Lunch Lady Cookie Bars
Nostalgic Flavors with Modern Appeal
There’s something magical about that first bite—the soft, tender crumb of the cookie base paired with the creamy frosting takes you straight back to childhood while satisfying adult taste buds too. I’ve perfected this recipe through countless test batches (my neighbors certainly didn’t complain about being taste-testers!). The bars have just the right level of sweetness, with that distinctive peanut butter richness that makes them impossible to resist. Plus, they’re substantial enough to feel like a proper treat without being overly heavy.
Simple Ingredients, Extraordinary Results
What makes these bars truly special is how basic pantry staples transform into something extraordinary. You don’t need fancy ingredients or complicated techniques—just good quality peanut butter (I prefer creamy, but chunky works too!), butter, brown sugar, and a few baking essentials. Last weekend, I realized I was out of vanilla extract halfway through mixing, and you know what? A splash of maple syrup worked beautifully as a substitute! These bars are forgiving and adaptable, making them perfect for both novice bakers and experienced kitchen wizards.
Essential Tips & Tricks
Perfecting the Base Layer
The secret to achieving that authentic lunch lady texture lies in not overmixing your dough. When I fold in the dry ingredients, I stop the moment they’re incorporated—this keeps the bars tender rather than tough. Another game-changer? Let your butter and eggs come to room temperature before starting. Cold ingredients don’t incorporate properly, leading to uneven texture. For that signature softness, press the dough gently into your pan rather than packing it down firmly. This creates that melt-in-your-mouth quality that makes these bars so irresistible.
Mastering the Peanut Butter Frosting
The crowning glory of these bars is undoubtedly that silky, creamy frosting. For optimal spreadability, frost the bars while they’re still slightly warm but not hot—about 15 minutes after coming out of the oven. This allows the frosting to melt just enough to create that signature smooth finish. I discovered (through a happy accident) that adding a tiny pinch of salt to the frosting amplifies the peanut butter flavor tremendously. For extra decadence, try my technique from Gluten-Free Healthy Chocolate Cookies and sprinkle some mini chocolate chips on top while the frosting is still warm.
Serving Ideas & Creative Variations
Perfect Pairings for Every Occasion
These Classic Peanut Butter Lunch Lady Cookie Bars shine as a standalone treat, but they reach new heights when paired thoughtfully. Serve them slightly chilled with a tall glass of milk for the ultimate after-school snack experience. For dinner parties, I cut them into bite-sized squares and serve alongside coffee or hot chocolate. Last Christmas, I arranged them on a platter with my Orleans Bread Pudding with Bourbon Sauce for a dessert buffet that had everyone coming back for seconds!
Exciting Flavor Twists
While the classic version is unbeatable, these bars welcome creative adaptations. Try swirling raspberry jam into the frosting for a PB&J inspired treat, or fold mini chocolate chips into the base for a chocolate-peanut butter explosion. My personal favorite variation? Adding a thin layer of melted chocolate between the cookie base and frosting—pure heaven! For a holiday twist, mix crushed candy canes into the frosting during December, or add orange zest to the batter in fall. The versatility is endless, making these bars a year-round favorite.
Storage & Troubleshooting Guide
Keeping Them Fresh and Delicious
To maintain that perfect texture, store these bars in an airtight container at room temperature for up to 3 days. The magic happens on day two when the flavors have had time to meld together—they actually taste better! For longer storage, refrigerate for up to a week, though I doubt they’ll last that long. If you’re planning ahead, these bars freeze beautifully for up to three months. I like to cut them first, then wrap individual portions in parchment before freezing—perfect for lunchboxes or emergency dessert cravings!
Solving Common Baking Challenges
If your bars turn out too dry, you likely overbaked them—next time, pull them from the oven when the center is just set but still looks slightly underdone. For frosting that’s too runny, simply add more powdered sugar, one tablespoon at a time. If your frosting is too thick, a splash of warm milk works wonders for achieving that perfect spreadable consistency. And if you notice the edges browning too quickly during baking, loosely cover the pan with aluminum foil for the remaining bake time. Remember, even imperfect bars still taste amazing!
Frequently Asked Questions
Can I use natural peanut butter for Classic Peanut Butter Lunch Lady Cookie Bars?
Natural peanut butter works, but commercial brands like Jif or Skippy produce more consistent results due to their stabilizers. If using natural, expect a slightly different texture.
How do I know when the bars are done baking?
Look for golden brown edges with a slightly paler center. A toothpick inserted in the middle should come out with a few moist crumbs—not wet batter.
Can I make these bars ahead of time for a party?
Absolutely! They actually taste better on day two. Make them up to 48 hours ahead and store in an airtight container at room temperature.
Is there a dairy-free option for the frosting?
Yes! Substitute vegan butter and use plant-based milk. The texture will be slightly different but still delicious with that classic peanut butter flavor.
Why did my bars crack on top?
Overbaking or cooling too quickly can cause cracking. Remove from the oven earlier next time and let them cool gradually at room temperature.
Final Thoughts
These Classic Peanut Butter Lunch Lady Cookie Bars have become my go-to recipe when I need something foolproof yet impressive. There’s something magical about how they transport everyone back to simpler times while still feeling special enough for any occasion. I love watching people’s faces light up with that first bite—the recognition, the nostalgia, the pure joy. For more delicious inspiration, check out my Pinterest collection where I’m constantly adding new variations and serving ideas for these beloved bars!