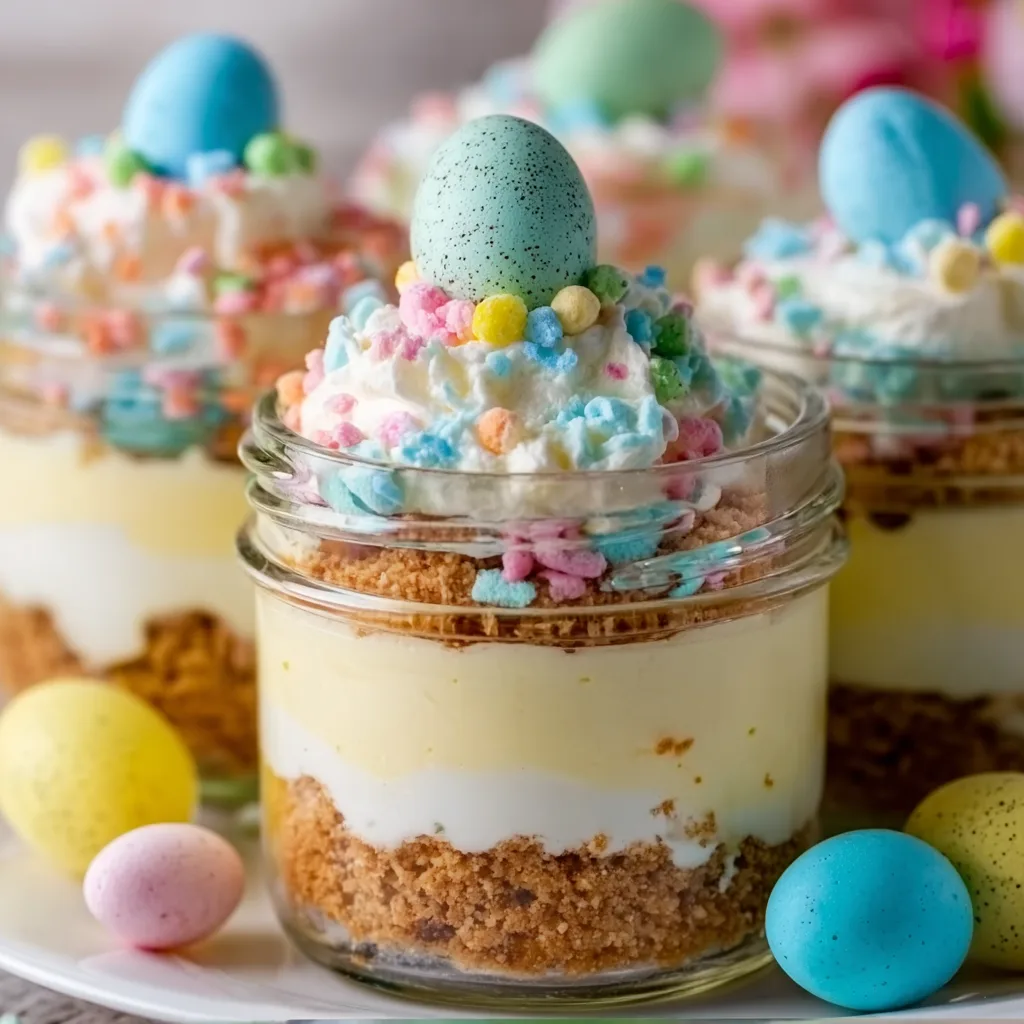
The first time I made these Easter Egg Cheesecake Jars, I truly didn't expect them to disappear so fast. I turned my back for literally five minutes, and when I looked again, half of them were gone! My family devoured them, raving about the creamy texture and delightful crunch. This recipe quickly became a holiday staple, a vibrant and irresistible treat that brings pure joy. You’re about to discover your new favorite way to celebrate Easter with a dessert that's as beautiful as it is dangerously addictive.
Why You'll Love This Easter Egg Cheesecake Jars
Irresistibly Creamy Layers
These Easter Egg Cheesecake Jars are a symphony of textures and flavors that will make your taste buds sing. Imagine a buttery, crunchy cookie crust perfectly complementing a lusciously smooth and velvety cheesecake filling. Each spoonful delivers a delightful contrast, creating a truly comforting and satisfying experience. The creamy filling, infused with just the right amount of sweetness, melts in your mouth, leaving you craving more. This isn't just dessert; it's a moment of pure bliss in every jar.
Effortlessly Festive & Fun
Forget complicated baking and endless cleanup! These cheesecake jars are designed for maximum impact with minimal effort, making them perfect for your Easter celebrations. They're individual portions, which means no slicing or serving hassle, and they look absolutely charming on any dessert table. Topped with colorful mini chocolate eggs, they instantly bring a festive, playful vibe. This is seriously addictive, and you'll love how easy it is to assemble these crave-worthy treats, leaving you more time to enjoy the holiday.
Essential Tips & Tricks
Perfecting Your Cheesecake Base
For the ultimate Easter Egg Cheesecake Jars, start with a solid crust. I always recommend using a good quality shortbread or digestive biscuit for a rich, buttery flavor that holds up well. Crush them finely, almost to a sand-like consistency, and mix thoroughly with melted butter before pressing firmly into the bottom of your jars. For the cheesecake filling, ensure your cream cheese is at room temperature. This is crucial for a smooth, lump-free mixture that whips up light and airy, preventing any grainy texture. Trust me, it makes all the difference!
Achieving Dreamy Toppings
The toppings are where these Easter Egg Cheesecake Jars truly shine! Beyond the iconic mini chocolate eggs, consider a drizzle of melted white chocolate or a sprinkle of pastel-colored edible glitter for extra sparkle. For an expert touch, lightly warm your chocolate eggs before placing them on top; this helps them settle into the creamy filling slightly, preventing them from rolling off. You could even add a dollop of freshly whipped cream just before serving for an extra layer of indulgence. Remember, presentation is key for these charming desserts. Check out more dessert ideas on my Pinterest for inspiration: https://www.pinterest.com/Elliemarenrecipe/
Serving Ideas & Variations
Beyond the Jar: Creative Presentations
While serving in jars is undeniably cute, don't limit yourself! These cheesecake layers can be adapted for other fun presentations. Try layering them in small glass tumblers for a slightly more elegant look, or even in mini springform pans for individual cheesecakes that can be unmolded. For a truly show-stopping dessert, you could create a large trifle-style bowl, layering the crust, filling, and toppings for a communal Easter treat. Imagine the gasps when you bring out a huge, colorful bowl of creamy goodness!
Flavor Twists for Every Palate
The beauty of these Easter Egg Cheesecake Jars lies in their versatility. While the classic vanilla cheesecake is divine, feel free to experiment with flavor variations. Stir in a teaspoon of lemon zest into the cream cheese mixture for a bright, zesty twist, or a tablespoon of cocoa powder for a rich chocolate cheesecake base. You could even swap out the cookie crust for crushed pretzels for a salty-sweet crunch! For a truly decadent experience, consider adding a layer of raspberry compote. This is a dessert everyone will ask you for!
Storage & Troubleshooting
Keeping Them Fresh & Delicious
Proper storage is key to enjoying your Easter Egg Cheesecake Jars for days. Once assembled, make sure to cover each jar tightly with its lid or plastic wrap to prevent the cheesecake from absorbing any refrigerator odors and to maintain its creamy texture. Store them in the coldest part of your refrigerator. They will stay fresh and utterly delicious for up to 3-4 days. For the best taste and texture, allow them to sit at room temperature for about 10-15 minutes before serving, letting the flavors truly bloom.
Solving Common Cheesecake Jar Woes
Encountering a few bumps on your cheesecake journey? Don't fret! If your crust seems too crumbly, add a tiny bit more melted butter, a teaspoon at a time, until it holds together when pressed. If your cheesecake filling is too runny, ensure your cream cheese was cold enough before mixing, or try chilling the jars for a longer period. Sometimes, adding an extra tablespoon of powdered sugar can help thicken it slightly. Remember, even with minor adjustments, these jars will still be phenomenally tasty.
Frequently Asked Questions
Can I make these Easter Egg Cheesecake Jars ahead of time?
Absolutely! These are perfect for making 1-2 days in advance. Just assemble them, cover tightly, and refrigerate. Add any delicate toppings right before serving for the best presentation.
What kind of jars should I use?
Small, wide-mouthed jars (like 4-6 oz Mason jars) are ideal for easy layering and serving. Any small, clear glass container will work beautifully for showcasing the layers.
Can I use different candies for topping?
Yes! Feel free to customize your Easter Egg Cheesecake Jars with your favorite Easter candies, like jelly beans, mini chocolate bunnies, or even colorful sprinkles. Get creative!
How long do they need to chill?
For the best firm and creamy texture, these jars should chill for at least 4 hours, but overnight is always preferred. A well-chilled cheesecake is a happy cheesecake!
Is there a gluten-free option for the crust?
Certainly! Use gluten-free graham crackers or shortbread biscuits for the crust. Ensure all other ingredients are also gluten-free to accommodate dietary needs.
Final Thoughts
These Easter Egg Cheesecake Jars are more than just a dessert; they're a celebration in every bite. The combination of creamy, dreamy cheesecake and the playful crunch of Easter eggs creates a treat that's impossible to resist. I love seeing the smiles they bring, and they truly make any gathering feel extra special and sweetly memorable. So go ahead, whip up a batch, and prepare for endless compliments and empty jars. You'll crave this again and again, long after Easter is over.