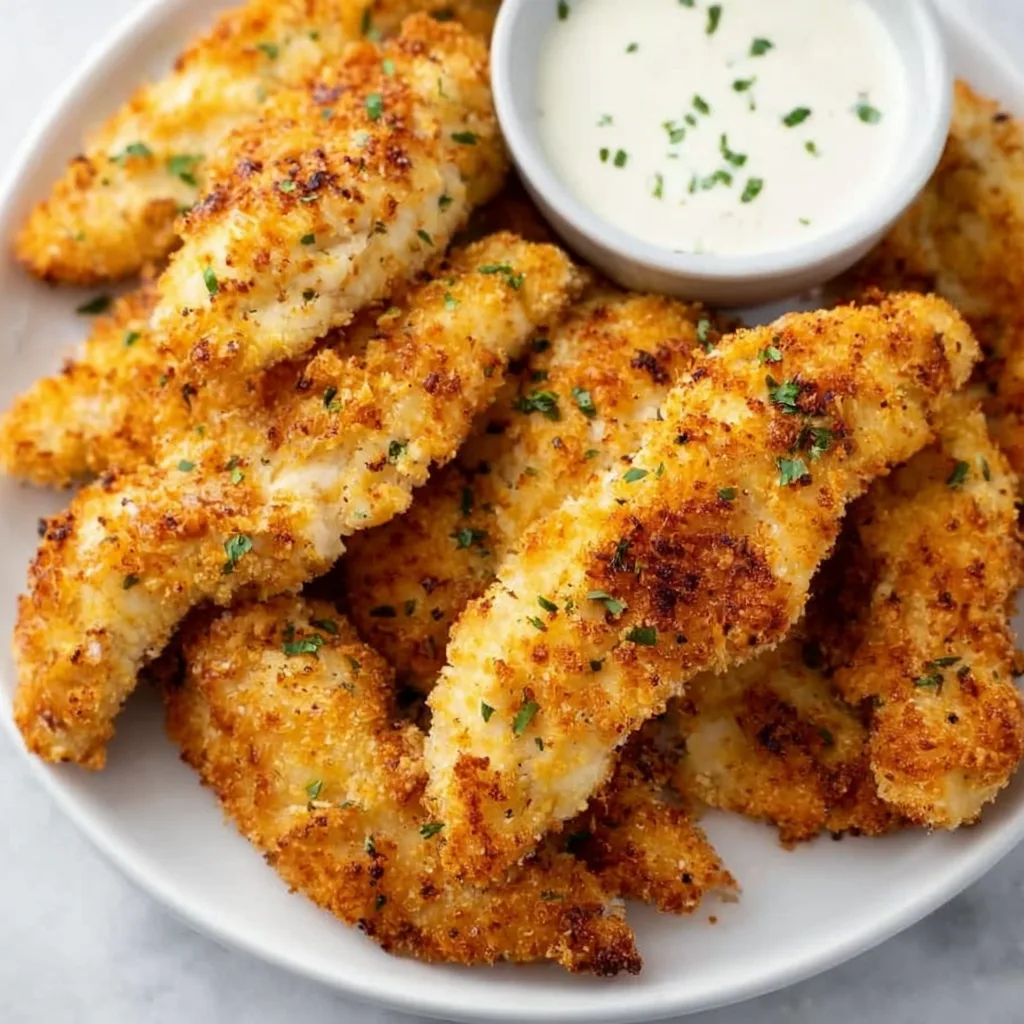
Homemade Baked Chicken Tenders are my ultimate weeknight dinner hero! Crispy on the outside, juicy on the inside, and so much healthier than their fried counterparts. I first perfected this recipe during a rainy Sunday when my kids were craving fast food, but I wanted something more wholesome. The aroma of seasoned breadcrumbs and tender chicken filled our kitchen, creating an instant family tradition. These golden-brown tenders deliver that satisfying crunch we all crave without the guilt. Plus, they’re incredibly versatile – perfect for dipping, slicing onto salads, or tucking into wraps like my Hot Honey Chicken Cutlets for a spicier twist.
Table of Contents
Recipe
Print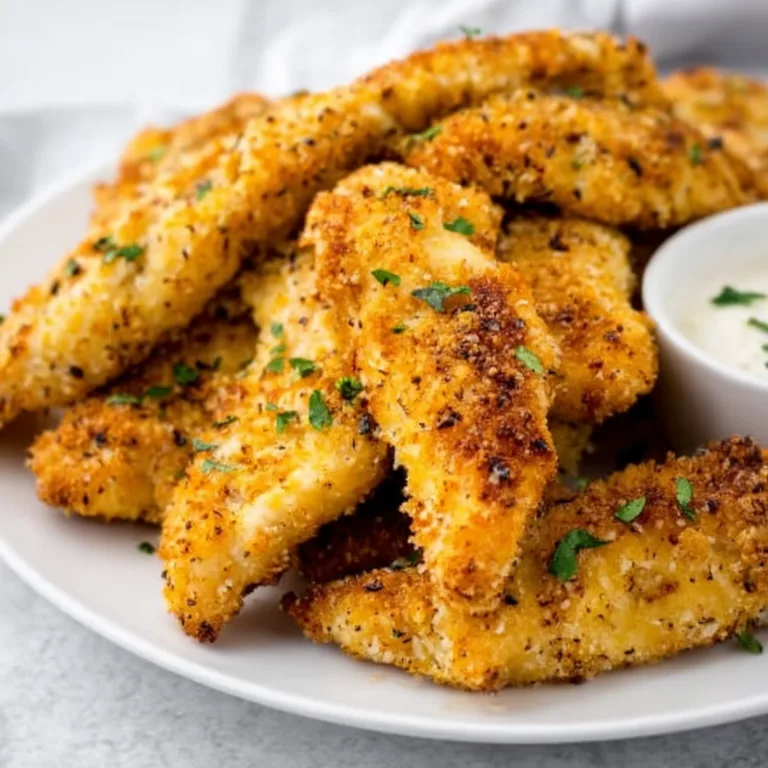
Crispy Homemade Baked Chicken Tenders Recipe
These Crispy Homemade Baked Chicken Tenders are golden, crunchy, and juicy on the inside. A healthier alternative to fried chicken, they are easy to make and perfect for snacks, lunch, or dinner.
- Total Time: 30 minutes
- Yield: 3 servings 1x
Ingredients
For the Chicken:
2 chicken breasts (cut into strips)
1/2 cup flour
2 eggs (beaten)
1 cup breadcrumbs (panko preferred)
1/2 teaspoon garlic powder
1/2 teaspoon paprika
Salt and pepper to taste
Optional:
Parmesan cheese for extra flavor
Dipping sauces (ketchup, honey mustard, ranch)
Instructions
1. Preheat oven to 200°C (400°F) and line a baking tray.
2. Season chicken strips with salt and pepper.
3. Prepare three bowls: flour, beaten eggs, and breadcrumbs mixed with garlic powder and paprika.
4. Coat each chicken strip in flour, then dip in egg, then coat with breadcrumbs.
5. Place coated tenders on the baking tray.
6. Bake for 18–22 minutes until golden and cooked through, flipping halfway.
7. Serve hot with your favorite dipping sauces.
Notes
Use panko breadcrumbs for extra crispiness.
Spray lightly with oil before baking for better color.
Do not overcrowd the tray.
Store leftovers in fridge up to 3 days.
- Prep Time: 10 minutes
- Cook Time: 20 minutes
- Category: Snack
- Method: Baking
- Cuisine: American
Nutrition
- Serving Size: 1 serving
- Calories: 380
- Sugar: 2 g
- Sodium: 420 mg
- Fat: 12 g
- Saturated Fat: 3 g
- Unsaturated Fat: 7 g
- Trans Fat: 0 g
- Carbohydrates: 28 g
- Fiber: 1 g
- Protein: 35 g
- Cholesterol: 95 mg
Keywords: baked chicken tenders, crispy chicken strips oven, healthy chicken snack, easy chicken tenders recipe, crunchy chicken without frying
Why You’ll Love These Homemade Baked Chicken Tenders
Healthier Than Takeout
These baked chicken tenders deliver all the crispy satisfaction without the deep fryer! By using a simple oven-baking method, you’ll cut down on unnecessary oils while still achieving that golden exterior we all crave. I’ve found that a light spray of olive oil on the breadcrumb coating creates that magical crispness. The natural juiciness of chicken breast strips stays perfectly locked in, making each bite tender and moist. My family actually prefers these to restaurant versions because they taste cleaner and more flavorful without that heavy, greasy feeling afterward.
Quick and Kid-Friendly
From start to finish, these tenders come together in about 30 minutes, making them perfect for busy weeknights when everyone’s hungry and patience is thin. The simple ingredients are pantry staples you likely already have on hand. Kids absolutely love helping with the dredging process – my little ones giggle with delight getting their hands messy dipping chicken into egg wash and breadcrumbs. This recipe has become our go-to for picky eaters, and I’ve yet to meet a child who doesn’t devour these with enthusiasm. The familiar shape and crispy texture make them an instant hit at any family table.
Essential Tips & Tricks
Perfect Breading Technique
The secret to ultra-crispy coating lies in your breading technique. I recommend setting up a proper dredging station: flour first (seasoned with a pinch of salt), then egg wash (with a splash of milk for richness), and finally breadcrumbs mixed with seasonings. Press the breadcrumbs firmly onto each piece of chicken to ensure maximum adhesion. For extra crunch, try using panko breadcrumbs or mixing in some crushed cornflakes. Allow the breaded tenders to rest for 5-10 minutes before baking – this helps the coating set properly and prevents it from falling off during cooking.
Temperature and Timing Matters
Baking at the right temperature is crucial for perfectly cooked chicken tenders. Preheat your oven to 425°F (220°C) – this higher heat creates a beautiful golden exterior while keeping the inside juicy. Always arrange tenders on a wire rack over a baking sheet to allow hot air circulation underneath, eliminating any soggy bottoms. Depending on thickness, they’ll need about 15-20 minutes, turning halfway through. For foolproof doneness, use an instant-read thermometer to check that the internal temperature reaches 165°F (74°C). This method reminds me of the technique I use for my Air Fryer Parmesan Crusted Chicken Wings – crispy perfection!
Serving Ideas & Creative Variations
Dipping Sauces and Sides
Elevate your homemade baked chicken tenders with an array of dipping options! My family’s favorites include honey mustard (2 parts mayo, 1 part honey, 1 part Dijon), ranch, BBQ sauce, or a simple sriracha mayo. For a complete meal, pair these crispy delights with colorful sides like sweet potato fries, roasted broccoli, or a crisp green salad. On busy nights, I love serving them alongside some quick-cooking quinoa or brown rice with steamed vegetables for a balanced plate. The combination of protein-packed tenders with fiber-rich sides creates a satisfying meal that keeps everyone full.
Flavor Variations
Don’t be afraid to experiment with different seasoning blends in your breadcrumb mixture! Italian-style tenders with oregano, basil, and grated Parmesan create a Mediterranean twist. For taco-inspired tenders, mix in chili powder, cumin, and smoked paprika. My personal favorite is a lemon-herb version with lemon zest, thyme, and garlic powder – reminiscent of my Mango Chicken Curry but with a crispy texture. You can also try coconut-crusted tenders by replacing half the breadcrumbs with shredded coconut and serving with sweet chili sauce for dipping. These variations keep the recipe exciting week after week!
Storage & Troubleshooting Guide
Proper Storage and Reheating
Store leftover chicken tenders in an airtight container in the refrigerator for up to 3 days. For best results when reheating, avoid the microwave which can make them soggy. Instead, place them on a wire rack in a 375°F (190°C) oven for 8-10 minutes until heated through and crispy again. You can also freeze these tenders for up to 2 months! After baking, let them cool completely, then freeze in a single layer on a baking sheet before transferring to a freezer bag. Reheat from frozen at 400°F (200°C) for about 15-18 minutes until piping hot and crispy.
Troubleshooting Common Issues
If your tenders come out with a soggy coating, the most likely culprit is overcrowding your baking sheet. Always arrange them with space between each piece to allow proper air circulation. Another common issue is breadcrumbs falling off during baking – this usually happens when you skip the flour step or don’t press the breadcrumbs firmly enough. For pale tenders lacking golden color, try a light spray of cooking oil before baking or broil them for the final 1-2 minutes (watching carefully to prevent burning). If your chicken seems dry, it’s likely overcooked – next time, check for doneness earlier or use chicken tenderloins which stay juicier.
Frequently Asked Questions
Can I make homemade baked chicken tenders ahead of time?
Yes! Bread them up to 24 hours in advance and store covered in the refrigerator. Alternatively, freeze the raw breaded tenders for up to 1 month and bake directly from frozen, adding 5-7 minutes to the cooking time.
What’s the best way to ensure crispy chicken tenders without frying?
Use panko breadcrumbs, bake on a wire rack, and spray lightly with oil before baking. The elevated rack allows hot air circulation underneath for maximum crispiness.
Can I use chicken thighs instead of breast meat?
Absolutely! Boneless, skinless chicken thighs work beautifully and often result in juicier tenders. Cut them into strips and follow the same breading and baking instructions.
How do I know when my chicken tenders are fully cooked?
They should reach an internal temperature of 165°F (74°C) and appear golden brown with no pink in the center when cut open.
What’s a good gluten-free option for homemade baked chicken tenders?
Replace regular flour with rice flour and use gluten-free breadcrumbs or crushed gluten-free cornflakes. The texture remains deliciously crispy with these simple swaps.
Final Thoughts
These Homemade Baked Chicken Tenders have become a cornerstone recipe in my kitchen – reliable, adaptable, and universally loved. There’s something deeply satisfying about creating a healthier version of a classic comfort food that still delivers on taste and texture. The simple joy on my family’s faces when I place a platter of these golden tenders on the table makes the minimal effort completely worthwhile. I’d love to see your creations if you try this recipe – tag me on Pinterest with your results! Happy cooking!