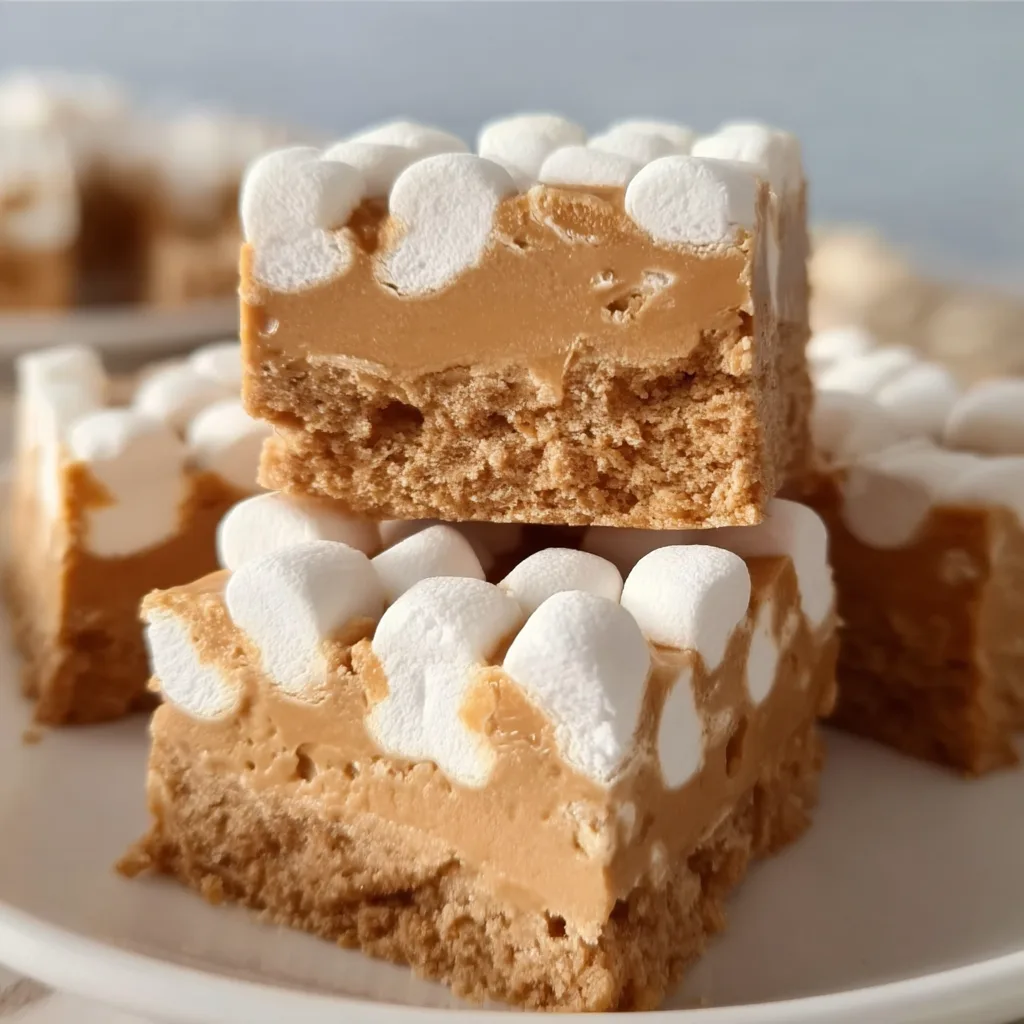
No-Bake Peanut Butter Marshmallow Squares are my absolute lifesaver when that sweet tooth strikes but the thought of turning on the oven makes me want to cry. These dreamy, creamy squares combine the perfect balance of salty peanut butter with pillowy marshmallows for a treat that practically melts in your mouth. I first made these for my daughter’s sleepover party, and watching those kids’ eyes light up as they reached for seconds (and thirds!) was all the validation I needed. The beauty lies in their simplicity—just a few ingredients, no baking required, and they’re ready faster than you can say “dessert emergency.” Trust me, these squares are about to become your new go-to sweet treat.
Table of Contents
Recipe
Print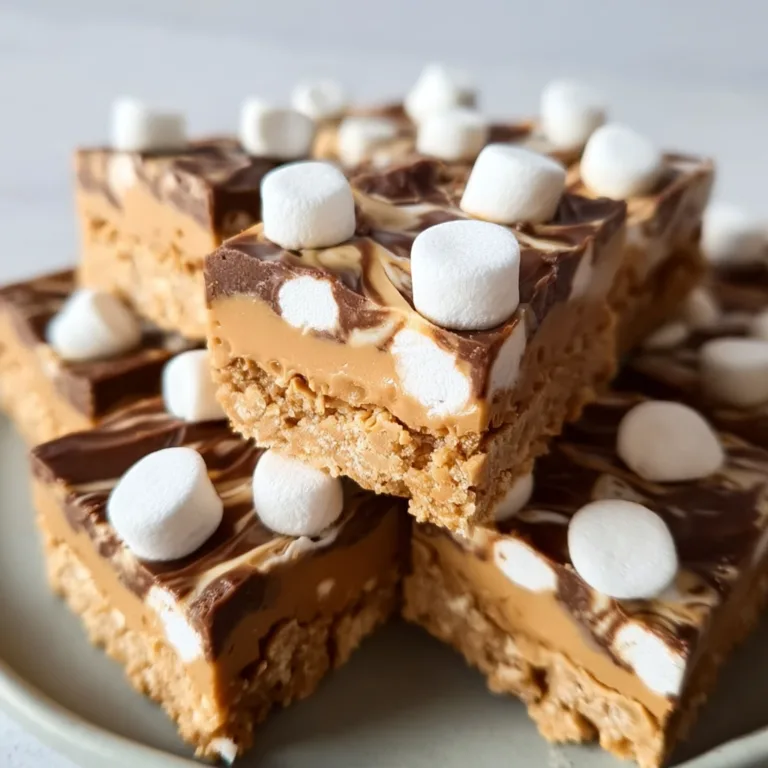
No-Bake Peanut Butter Marshmallow Squares Recipe
These No-Bake Peanut Butter Marshmallow Squares are a nostalgic, gooey, and ultra-satisfying treat made with creamy peanut butter, butterscotch chips, and mini marshmallows. A quick and easy dessert bar that sets in the fridge with zero baking required.
- Total Time: 2 hours 15 minutes
- Yield: 16 squares 1x
Ingredients
1/2 cup unsalted butter
1 cup creamy peanut butter
1 (11 oz) bag butterscotch chips
1 (10 oz) bag mini marshmallows
1/2 tsp vanilla extract
Pinch of salt
Instructions
1. Line an 8×8-inch pan with parchment paper and lightly grease it.
2. In a saucepan over medium-low heat, melt butter and peanut butter together until smooth.
3. Add butterscotch chips and stir constantly until fully melted and smooth.
4. Remove from heat and stir in vanilla and a pinch of salt. Let cool for 3–4 minutes (important so marshmallows don’t melt).
5. Gently fold in mini marshmallows until evenly coated.
6. Pour mixture into prepared pan and spread evenly.
7. Refrigerate for at least 2 hours or until firm.
8. Cut into squares and serve chilled or at room temperature.
Notes
Don’t overheat or the butterscotch can seize—low and slow is key.
Let the mixture cool slightly before adding marshmallows to keep them intact.
Add chopped peanuts or a drizzle of chocolate for a twist.
- Prep Time: 10 minutes
- Cook Time: 5 minutes
- Category: Dessert, No-Bake, Bars
- Method: No-Bake
- Cuisine: American
- Diet: Vegetarian
Nutrition
- Serving Size: 1 square
- Calories: 210
- Sugar: 18g
- Sodium: 95mg
- Fat: 12g
- Saturated Fat: 5g
- Unsaturated Fat: 6g
- Trans Fat: 0g
- Carbohydrates: 24g
- Fiber: 0g
- Protein: 3g
- Cholesterol: 10mg
Keywords: no bake peanut butter marshmallow squares, butterscotch marshmallow bars, easy no bake dessert, vintage peanut butter squares
Why You’ll Love This No-Bake Peanut Butter Marshmallow Squares
Quick Preparation With Maximum Impact
These no-bake squares are the definition of kitchen efficiency. I remember making these on a Wednesday night when my husband texted that friends were stopping by—panic mode activated! But within 30 minutes, these beauties were setting in the refrigerator. The prep is wonderfully straightforward: melt, mix, press, and chill. No complicated techniques or special equipment needed. The peanut butter creates this velvety base that hugs every marshmallow perfectly. And that first bite? Pure bliss as the creamy peanut butter melts against the soft, sweet marshmallows. It’s a textural dream that delivers big flavor with minimal effort.
Family-Friendly And Customizable
What I adore about these squares is how they bring everyone together. My picky nephew who “doesn’t like dessert” (who doesn’t like dessert?!) devoured three squares in one sitting. The recipe is incredibly adaptable—swap in crunchy peanut butter for extra texture, add chocolate chips for a more decadent version, or drizzle caramel on top for special occasions. They’re perfect for potlucks, bake sales (ironically!), or after-school snacks. The sweet-salty combination satisfies both kids and adults, making them universally appealing. Plus, they’re easy enough that children can help make them, creating sweet kitchen memories along with delicious treats.
Essential Tips & Tricks
Ingredient Selection Matters
The quality of your ingredients makes all the difference in these simple squares. I learned this lesson when I tried making them with natural peanut butter—disaster! Stick with commercial creamy peanut butter (like Jif or Skippy) for the right consistency. The natural kinds can separate and won’t set properly. For marshmallows, fresh ones are non-negotiable—stale marshmallows won’t melt as beautifully or give that perfect chewy texture. I also recommend using real butter rather than margarine for a richer flavor profile. The vanilla extract might seem optional, but those few drops add incredible depth that transforms these squares from good to absolutely crave-worthy.
Perfect Setting Techniques
The chilling process is crucial for these squares to achieve the right texture. Line your pan with parchment paper with overhang on the sides—this creates handles that make removing the entire slab effortless. Press the mixture firmly and evenly into your pan; I use the bottom of a measuring cup greased with a tiny bit of butter to prevent sticking. For clean cuts, chill the mixture completely (at least 2 hours), then use a sharp knife dipped in hot water and wiped clean between cuts. If you’re in a hurry, 30 minutes in the freezer can substitute for refrigeration, but the texture is best when refrigerated. Remember that patience yields the prettiest squares!
Serving Ideas & Creative Variations
Elegant Presentation Options
Transform these humble squares into showstopping desserts with thoughtful presentation. For dinner parties, I cut them into tiny cubes, place each on a small square of parchment, and arrange on a wooden board with fresh berries scattered around. For gifting, stack them in a clear cellophane bag tied with ribbon and a handwritten note. Try cutting them with cookie cutters for themed events—stars for July 4th or hearts for Valentine’s Day. For an elevated touch, dust the top with a light sprinkle of sea salt just before serving to enhance the sweet-salty contrast. These simple touches make the squares feel special without requiring any additional baking skills.
Flavor Twists And Add-Ins
The basic recipe is just the beginning—the flavor possibilities are endless! My favorite variation includes a layer of melted chocolate on top, creating a peanut butter cup vibe that’s absolutely irresistible. Adding mini chocolate chips to the mixture creates delightful pockets of chocolate throughout. For a grown-up version, try stirring in 2 tablespoons of bourbon or rum before adding the marshmallows. Crushed pretzels, graham cracker pieces, or rice krispies add wonderful textural contrast. For holiday versions, mix in crushed candy canes at Christmas or colored sprinkles for birthdays. Each variation maintains the easy no-bake nature while creating a completely new dessert experience.
Storage & Troubleshooting Guide
Optimal Storage Methods
Keeping these squares at their best quality requires proper storage. In the refrigerator, they’ll maintain perfect texture for up to a week when stored in an airtight container with parchment paper between layers to prevent sticking. For longer storage, these squares freeze beautifully for up to three months—just wrap individual pieces in plastic wrap, then store in a freezer bag. I like to thaw them in the refrigerator overnight, though eating them slightly frozen creates an amazing chewy texture that’s perfect for summer days. Never store these at room temperature for more than a few hours, especially in warm weather, as they’ll become too soft and lose their defined shape.
Fixing Common Problems
Even the simplest recipes can go sideways sometimes. If your mixture seems too sticky to handle, wet your hands with cold water before pressing into the pan. Too dry or crumbly? The peanut butter-to-marshmallow ratio might be off—add a tablespoon of honey or corn syrup to help bind everything. If the squares didn’t set properly, they likely need more refrigeration time. For squares that are too hard, you may have overheated the mixture—next time, remove from heat as soon as everything is melted. If the marshmallows completely dissolved instead of maintaining some texture, the mixture was probably too hot—lower the heat and stir more gently next time.
Frequently Asked Questions
Can I use natural peanut butter for No-Bake Peanut Butter Marshmallow Squares?
Not recommended. Natural peanut butter separates and contains oils that prevent proper setting. Commercial brands like Jif or Skippy work best for the right consistency and flavor.
How long do these squares need to set?
At least 2 hours in the refrigerator for optimal texture. In a pinch, 30 minutes in the freezer works, but the texture may be slightly different.
Can I make these squares ahead of time?
Absolutely! They stay fresh for up to a week refrigerated and can be frozen for three months. Perfect for preparing in advance for parties or gifts.
Are there any dairy-free options?
Yes! Substitute the butter with coconut oil or dairy-free margarine. Just ensure your marshmallows are gelatin-free if making a fully vegetarian version.
What’s the best way to cut these cleanly?
Use a sharp knife dipped in hot water and wiped clean between cuts. Refrigerate thoroughly first for the cleanest edges on your squares.
Final Thoughts
No-Bake Peanut Butter Marshmallow Squares have saved countless gatherings and satisfied endless cravings in my home. They represent everything I love about simple, joyful cooking—minimal effort with maximum delight. The way these squares bring together creamy peanut butter with pillowy marshmallows creates something truly greater than the sum of its parts. Whether you’re a seasoned baker or kitchen novice, these squares welcome everyone with their foolproof preparation and irresistible taste. I hope they bring as much sweetness to your life as they have to mine! Find more inspiration for your next treat on my Pinterest boards.