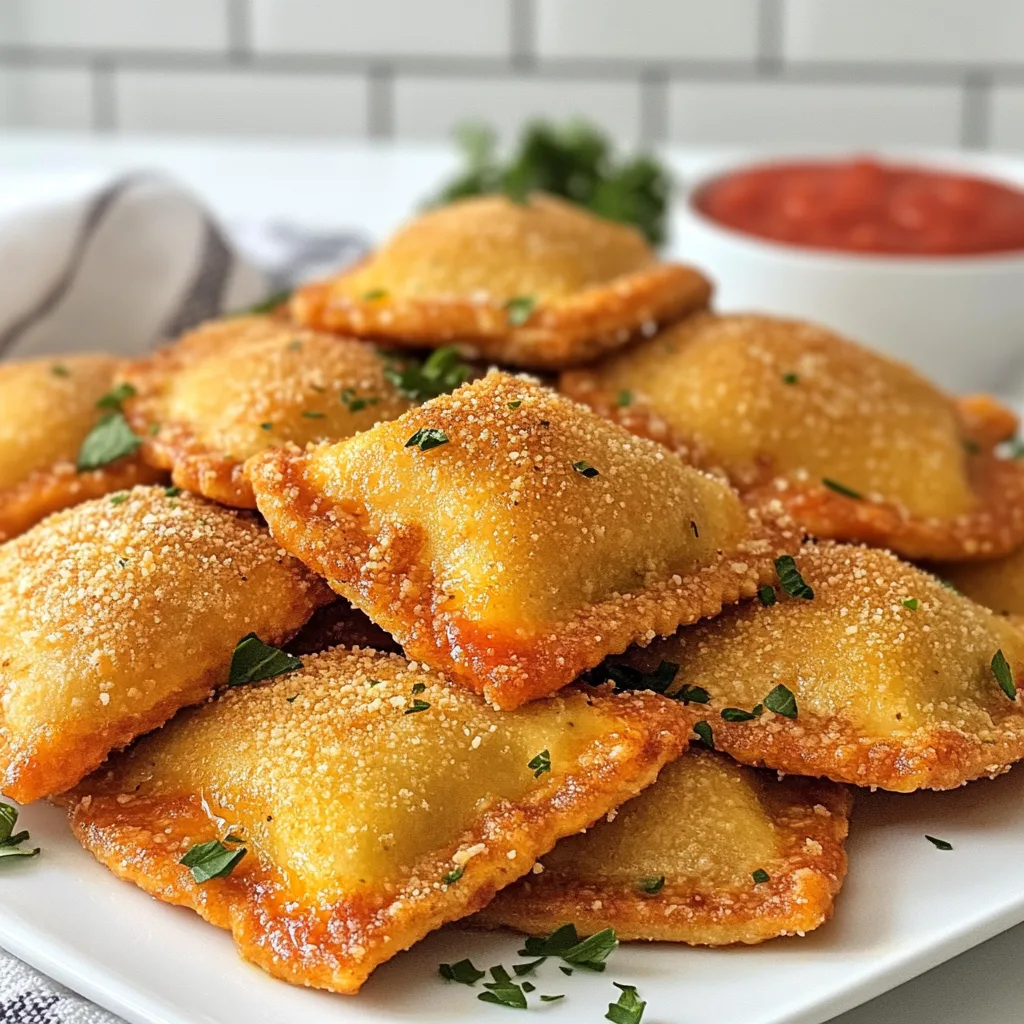
Cheese-Filled Toasted Ravioli brings crispy, golden perfection to your table in every bite! These delectable little pockets of joy combine a satisfyingly crunchy exterior with molten cheese centers that create the most incredible texture contrast. I first discovered these at a little Italian bistro in St. Louis and immediately knew I had to recreate them at home. There’s something magical about that first bite—the crackle of the breading giving way to oozy, melty cheese that just makes your soul happy. Perfect as an appetizer, snack, or even a fun dinner paired with marinara sauce, these toasted ravioli are surprisingly simple to make but deliver restaurant-quality results.
They’re also incredibly versatile, just like my Crispy Baked Ranch Chicken that everyone raves about!
Table of Contents
Recipe
Print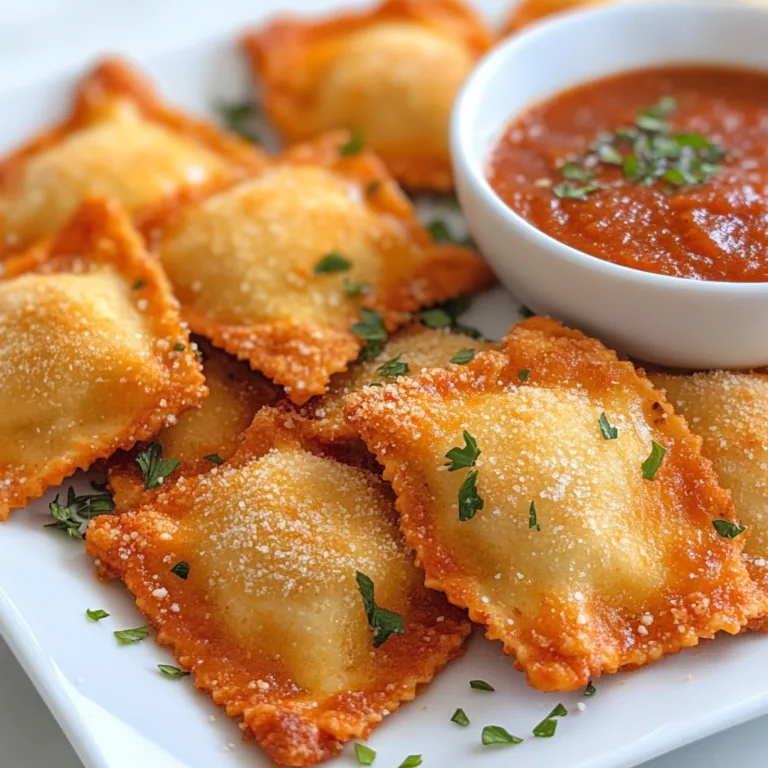
Delicious Cheese-Filled Toasted Ravioli Recipe | Crispy & Cheesy Appetizer
Delicious Cheese-Filled Toasted Ravioli are crispy, golden, and packed with melty cheese inside. Breaded and baked or fried to perfection, these bite-sized Italian-inspired appetizers are perfect for parties, game day, or anytime you’re craving a crunchy, cheesy snack.
- Total Time: 30 minutes
- Yield: 6 servings 1x
Ingredients
1 package (20–25 oz) refrigerated or frozen cheese ravioli
2 large eggs
2 tbsp milk
1½ cups Italian-seasoned breadcrumbs
1/2 cup grated parmesan cheese
1 tsp garlic powder
1/2 tsp salt
1/2 tsp black pepper
For cooking:
Oil for frying or cooking spray for baking
For serving:
Warm marinara sauce
Fresh parsley (optional)
Instructions
1. Cook ravioli according to package directions until just tender. Drain and let cool slightly.
2. In a bowl, whisk eggs with milk.
3. In another bowl, combine breadcrumbs, parmesan, garlic powder, salt, and pepper.
4. Dip each ravioli into the egg mixture, then coat thoroughly with breadcrumb mixture.
5. For frying: Heat oil to 350°F (175°C) and fry ravioli in batches until golden, about 2–3 minutes.
6. For baking: Preheat oven to 400°F (205°C), place ravioli on a lined baking sheet, spray lightly with oil, and bake for 15–18 minutes, flipping halfway.
7. Remove and drain on paper towels if fried.
8. Serve warm with marinara sauce for dipping.
Notes
• Do not overcook ravioli before breading.
• Freeze breaded ravioli before frying for extra crunch.
• Air fryer option: cook at 375°F for 8–10 minutes.
- Prep Time: 15 minutes
- Cook Time: 15 minutes
- Category: Appetizer
- Method: Fried or Baked
- Cuisine: Italian-Inspired
- Diet: Vegetarian
Nutrition
- Serving Size: 6 pieces
- Calories: 360
- Sugar: 3g
- Sodium: 720mg
- Fat: 18g
- Saturated Fat: 6g
- Unsaturated Fat: 10g
- Trans Fat: 0g
- Carbohydrates: 36g
- Fiber: 2g
- Protein: 14g
- Cholesterol: 85mg
Keywords: toasted ravioli, cheese filled ravioli, crispy ravioli appetizer
Why You’ll Love This Cheese-Filled Toasted Ravioli
A Crowd-Pleasing Appetizer
These crispy little gems have universal appeal that makes them disappear within minutes at any gathering. The contrast between the crunchy golden exterior and the gooey cheese filling creates a texture experience that’s simply irresistible. I served these at my sister’s birthday party last month, and guests were literally hovering around the serving platter! The beauty of cheese-filled toasted ravioli is their versatility—they work for casual game nights, elegant dinner parties, or even as an after-school snack that kids and adults equally adore. Plus, they’re perfectly portioned for easy eating while mingling.
Simple Ingredients, Spectacular Results
What makes this recipe so approachable is that it requires just a handful of ingredients you likely already have on hand. Store-bought cheese ravioli forms the perfect base—I prefer the refrigerated kind for their superior texture, but frozen work wonderfully too. The breading process is delightfully simple: a dip in seasoned flour, then egg wash, and finally a coating of Italian-seasoned breadcrumbs creates that perfect crispy shell. I love adding a touch of garlic powder and parmesan to the breadcrumbs for an extra flavor dimension. The best part? You can prep these ahead of time and fry or bake just before serving!
Essential Tips & Tricks
Mastering the Perfect Crisp
The secret to exceptionally crispy ravioli lies in both technique and temperature. For deep frying, maintain your oil at a steady 350°F—too cool and they’ll absorb excess oil, too hot and they’ll burn before the inside warms. I use a candy thermometer to monitor this precisely. If you’re baking, a light spritz of cooking spray on each ravioli creates that golden finish. The most crucial tip I’ve discovered is working with completely dry ravioli—pat them thoroughly with paper towels before breading. This prevents the coating from becoming soggy and ensures that satisfying crunch in every bite.
Elevating the Flavor Profile
Don’t miss the opportunity to infuse extra flavor into your toasted ravioli at every step. The breading station is your canvas for creativity! I like mixing dried Italian herbs, garlic powder, and freshly grated Parmesan into my breadcrumbs. For an extra dimension, add a pinch of red pepper flakes for subtle heat or smoked paprika for depth. Another game-changing tip I learned from a chef friend: lightly season the ravioli themselves before starting the breading process. This creates layers of flavor that make these simple appetizers taste like they came from a fancy restaurant, not your home kitchen!
Serving Ideas & Creative Variations
Perfect Pairing Suggestions
Serve your cheese-filled toasted ravioli with complementary dips that enhance their flavors. While traditional marinara is a classic choice (I warm mine with a splash of red wine and fresh basil), don’t be afraid to experiment! A creamy garlic aioli adds luxurious richness, while pesto offers herbaceous notes that beautifully contrast the cheesy filling. For presentation, I arrange them on a wooden board with small dipping bowls and garnish with fresh herbs and lemon wedges for brightness. These ravioli pair wonderfully with light cocktails or a crisp Pinot Grigio, creating a balanced appetizer experience that won’t overwhelm your main course.
Exciting Flavor Twists
Transform this classic appetizer by exploring creative fillings and coatings. While traditional cheese ravioli are divine, try mushroom, spinach, or butternut squash varieties for seasonal twists. For the coating, panko breadcrumbs create extra crunch, while crushed pistachios offer nutty elegance. My family goes wild for the “pizza ravioli” variation—I add pepperoni bits to the breadcrumbs and serve with a pizza sauce dip! For a fusion approach inspired by my Honey Garlic Shrimp, try a sweet-savory glaze drizzled over your toasted ravioli just before serving. The possibilities are truly endless!
Storage & Troubleshooting Guide
Keeping Them Crispy Later
The challenge with cheese-filled toasted ravioli is maintaining that perfect crispness when stored. For best results, cool completely before storing in an airtight container lined with paper towels to absorb moisture. They’ll keep in the refrigerator for up to 3 days. To reheat, avoid the microwave which makes them soggy—instead, use a 350°F oven for 5-7 minutes until heated through. For make-ahead convenience, you can freeze the breaded (uncooked) ravioli on a baking sheet, then transfer to freezer bags once solid. This allows you to cook them directly from frozen—just add 1-2 minutes to the cooking time.
Solving Common Challenges
Even experienced cooks encounter occasional issues with toasted ravioli. If your breading isn’t sticking properly, the likely culprit is moisture management. Ensure ravioli are thoroughly patted dry, and try chilling them for 15 minutes after breading to help the coating adhere. For filling leakage during cooking, lower your oil temperature slightly and handle ravioli gently—small cracks in the pasta allow cheese to escape. If your ravioli are browning too quickly before heating through, your oil is too hot or your oven temperature needs adjusting. Remember that perfecting the technique may take practice, but even imperfect ravioli are deliciously edible mistakes!
Frequently Asked Questions
Can I make cheese-filled toasted ravioli in an air fryer?
Absolutely! Preheat to 375°F, spray the ravioli with cooking oil, and cook for 8-10 minutes, flipping halfway through. They get wonderfully crispy with minimal oil.
What’s the best cheese ravioli to use?
Fresh refrigerated ravioli work best as they have better texture and flavor. Look for ones with whole milk ricotta or a cheese blend for the most delicious filling.
Can I prepare these in advance for a party?
Yes! Bread them up to 24 hours ahead and refrigerate in a single layer. Fry or bake just before serving for the freshest, crispiest results.
How do I keep the breading from falling off?
Ensure ravioli are completely dry before breading, and press the coating firmly onto each piece. Chilling them for 15-30 minutes before cooking also helps adhesion.
Are baked cheese-filled toasted ravioli as crispy as fried?
Baked versions can be nearly as crispy if you spray them with oil before baking and flip halfway through. The texture is slightly different but still delicious.
Final Thoughts
Cheese-Filled Toasted Ravioli represents comfort food at its finest—simple yet incredibly satisfying. There’s something magical about transforming humble ingredients into crispy, cheese-filled bites that bring people together around the table. Whether you’re serving them at a gathering or enjoying a cozy night in, these golden pockets of joy deliver restaurant-quality flavor with homemade love. I hope you’ll try them soon and experience the delight of that perfect first bite—crispy exterior giving way to melty cheese that warms both plate and heart. Find more inspiration for your next gathering on my Pinterest board where I’m always sharing new appetizer ideas!