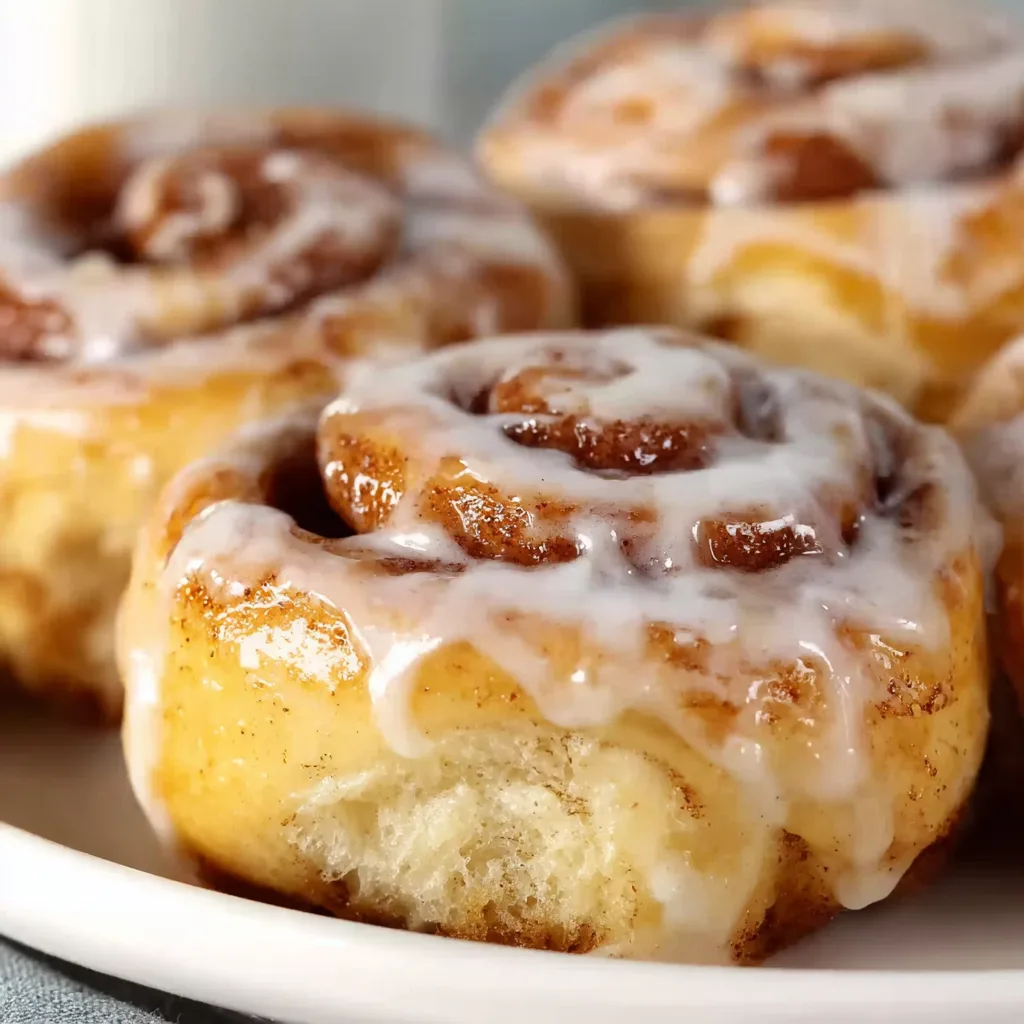
Easy Bisquick Cinnamon Rolls have completely transformed my weekend breakfast routine. That moment when the kitchen fills with the warm aroma of cinnamon and sugar? Pure magic. I used to think homemade cinnamon rolls required hours of kneading and proofing, but this shortcut version using Bisquick has become my secret weapon for impressing overnight guests. The first time I made these for my sister's visit, she couldn't believe they weren't from a bakery! The beauty lies in their simplicity—fluffy, tender rolls with swirls of cinnamon-sugar goodness, all ready in about 30 minutes. If you love comfort food that feels like a warm hug, these easy cinnamon rolls will absolutely steal your heart.
Why You'll Love These Easy Bisquick Cinnamon Rolls
Quick Preparation with Maximum Flavor
The time-saving magic of Bisquick transforms what's typically a half-day project into a quick morning treat. I adore how the dough comes together in just minutes—mix, roll, fill, and bake! The pre-mixed leavening agents in Bisquick create perfectly fluffy rolls without the usual waiting time for yeast to activate and dough to rise. Even on sleepy Sunday mornings, I can have these in the oven before my coffee is finished brewing. The cinnamon-sugar filling caramelizes beautifully, creating those irresistible gooey pockets that make your eyes close with each bite. It's breakfast nirvana without the traditional fuss.
Budget-Friendly Indulgence
These rolls are a pantry-friendly delight that won't strain your grocery budget. Most ingredients are likely already in your kitchen—Bisquick, butter, cinnamon, and sugar form the foundation. I started making these during a particularly tight month when bakery treats weren't in the budget, and they've remained a staple ever since. One box of Bisquick yields multiple batches, making each roll cost just pennies compared to $4-5 at coffee shops. The simple glaze requires only powdered sugar, milk, and vanilla, yet delivers that perfect sweet finish. Budget-conscious baking has never tasted so indulgent!
Essential Tips & Tricks
Perfecting Your Dough Consistency
Achieving the ideal dough texture makes all the difference between good and extraordinary cinnamon rolls. I've learned to add milk gradually until the dough just comes together—slightly tacky but not sticky. When rolling, a light dusting of flour prevents sticking while maintaining tenderness. Don't overwork the dough; gentle handling keeps it from becoming tough. I once made the mistake of adding too much flour, resulting in dry rolls that crumbled rather than pulled apart in soft layers. Room temperature ingredients blend more evenly, so I set my butter out while gathering other ingredients. This small step ensures a smooth, pliable dough that rolls beautifully.
Mastering the Perfect Swirl
The secret to those hypnotic spirals lies in even distribution of your filling and proper rolling technique. I spread softened (not melted) butter all the way to the edges, then sprinkle the cinnamon-sugar mixture uniformly. Press it gently into the butter to help it adhere. When rolling, start from the long edge and maintain steady, even pressure for a tight cylinder without air pockets. For clean cuts that preserve your swirl pattern, use unflavored dental floss instead of a knife—slide it under the roll, cross the ends and pull. This technique, which I learned from my favorite breakfast recipes, prevents the squishing that can happen with knife cuts.
Serving Ideas & Creative Variations
Delicious Pairing Suggestions
These cinnamon rolls create an unforgettable breakfast experience when paired thoughtfully. I serve them slightly warm with a mug of cinnamon-spiced coffee or creamy chai tea that echoes their spiced notes. For brunch gatherings, balance their sweetness with savory elements—crispy bacon or a simple egg scramble provides wonderful contrast. Fresh fruit, particularly berries or sliced peaches, adds brightness that cuts through the richness. When hosting overnight guests, I prepare everything the night before and bake in the morning. The rolls' aroma wafting through the house is the most delightful alarm clock! Create a casual serving station with small plates and napkins for easy self-service.
Exciting Flavor Twists
Transform the basic recipe with seasonal adaptations that keep this treat exciting year-round. In fall, I add finely diced apples and a pinch of nutmeg to the filling, creating an apple pie-inspired variation that's absolutely divine. During the holidays, orange zest in the dough and a cranberry-studded filling bring festive flair. For chocolate lovers, mini chocolate chips sprinkled with the cinnamon sugar create melty pockets of goodness. My neighbor's favorite twist includes chopped pecans and a drizzle of maple-infused glaze that elevates these rolls to gourmet status. Don't be afraid to experiment with extracts like almond or coconut in your glaze for subtle flavor enhancements.
Storage & Troubleshooting Guide
Keeping Rolls Fresh
Maintaining optimal freshness ensures every bite remains as delightful as when first baked. Store completely cooled rolls in an airtight container at room temperature for up to 2 days. For longer storage, refrigerate for up to a week, though the texture becomes slightly denser. I often make a double batch and freeze half—individually wrap cooled, unglazed rolls in plastic wrap, then place in a freezer bag for up to 3 months. When ready to enjoy, thaw overnight in the refrigerator, warm in a 300°F oven for 10 minutes, and add fresh glaze. For day-old rolls, a quick 15-second microwave revival restores their soft, pillowy texture.
Fixing Common Baking Issues
Even experienced bakers encounter troubleshooting moments with cinnamon rolls. If your rolls spread too much while baking, the dough was likely too wet—next time, add an extra tablespoon of Bisquick. Rolls turning out dense? You may have overworked the dough; remember to mix just until combined and handle gently. For filling that leaks out during baking, try chilling the rolled log for 15 minutes before cutting. I once had rolls that wouldn't brown properly—the solution was moving them to a higher oven rack and brushing with a little milk before baking. If your glaze is too thick, add milk a few drops at a time; if too thin, incorporate more powdered sugar.
Frequently Asked Questions
Can I make Easy Bisquick Cinnamon Rolls ahead of time?
Absolutely! Prepare through the cutting stage, place in your baking pan, cover tightly with plastic wrap, and refrigerate overnight. In the morning, let them sit at room temperature for 20 minutes before baking.
Can I substitute the Bisquick with another ingredient?
While Bisquick provides the perfect texture, you can substitute with a homemade mix of flour, baking powder, salt, and cut-in shortening. The results will be slightly different but still delicious.
How do I know when my cinnamon rolls are perfectly done?
Look for golden-brown edges and a firm center that springs back when lightly touched. An internal temperature of 190°F indicates they're perfectly baked through.
Why did my filling leak out during baking?
This typically happens when the filling isn't properly sealed. Ensure you leave a small border when spreading ingredients and firmly pinch the seam when rolling the dough.
Can I make these Easy Bisquick Cinnamon Rolls without dairy?
Yes! Use plant-based milk and butter alternatives. Many bakers report excellent results using almond milk and vegan butter sticks in this recipe.
Final Thoughts
These Easy Bisquick Cinnamon Rolls have earned their place as my go-to breakfast indulgence—perfect for both special occasions and "just because" moments. The simplicity of preparation combined with their irresistible aroma and taste creates kitchen memories worth repeating. I find myself returning to this recipe whenever I need a foolproof way to make mornings special. Whether you're a novice baker or seasoned pro, these rolls deliver consistent joy with minimal effort. Find more inspiration for your baking adventures on my Pinterest board where I'm always adding new ideas!