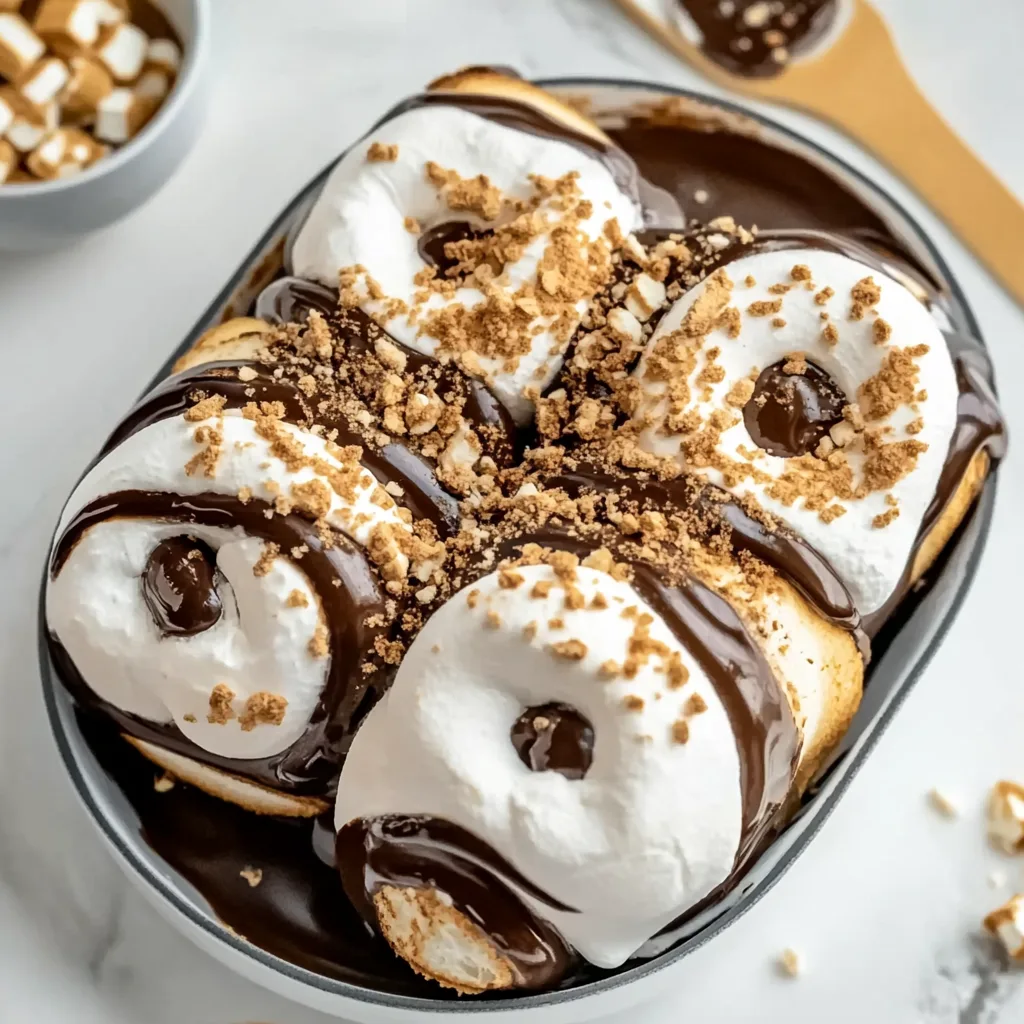
S’mores Roll-Ups bring all the nostalgic flavors of campfire treats right to your kitchen, no bonfire required! I discovered this genius hack last summer when rain canceled our backyard s’mores night, and my disappointed kids were about to revolt. With some tortillas, chocolate, and marshmallows already on hand, these roll-ups were born out of pure desperation—and they’ve become a family favorite ever since. The combination of gooey marshmallows and melted chocolate wrapped in a crispy, cinnamon-sugar coated tortilla creates that perfect s’mores experience without the sticky fingers and flying embers. Trust me, once you try these easy S’mores Roll-Ups, you’ll wonder why you ever bothered with graham crackers at all!
Table of Contents
Recipe
Print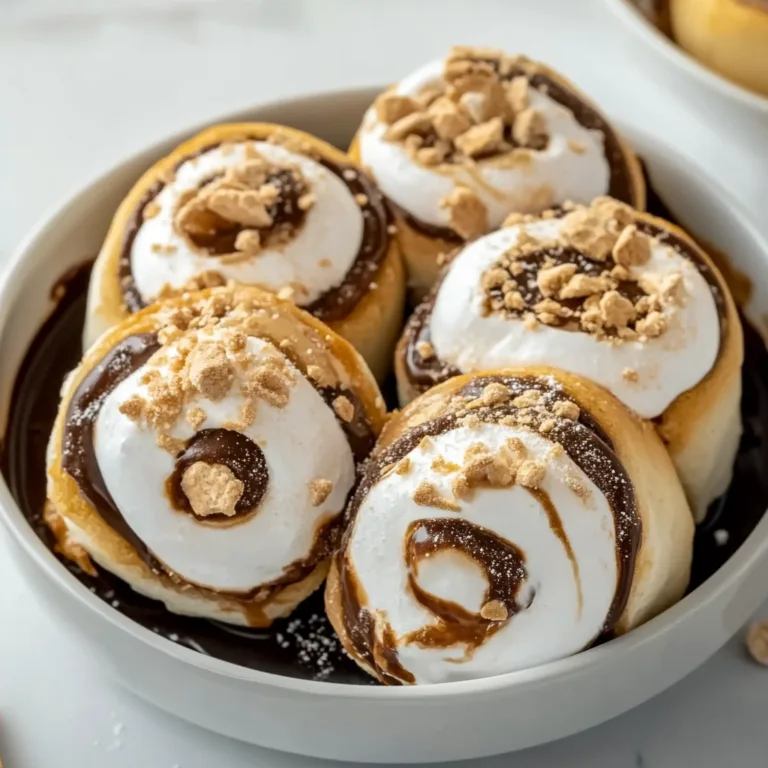
Delicious S’mores Roll-Ups Recipe | Easy & Quick Sweet Treat
Delicious S’mores Roll-Ups are a quick, fun, and irresistibly gooey sweet treat that brings classic campfire flavors right into your kitchen. Soft bread is rolled around melty chocolate and marshmallows, then cooked until golden, crispy on the outside, and perfectly gooey inside. Finished with a buttery cinnamon-sugar coating, these roll-ups are sweet, nostalgic, and incredibly satisfying. Perfect for last-minute desserts, after-school snacks, or late-night cravings, this easy recipe comes together in minutes using simple pantry staples.
- Total Time: 20 minutes
- Yield: 8 roll-ups 1x
Ingredients
8 slices white sandwich bread
1 cup mini marshmallows
1 cup milk chocolate chips or chocolate bars, chopped
3 tablespoons unsalted butter, melted
¼ cup granulated sugar
1 teaspoon ground cinnamon
Optional: powdered sugar or chocolate sauce for serving
Instructions
1. Trim crusts from bread slices and flatten each slice with a rolling pin.
2. Place marshmallows and chocolate along one edge of each slice.
3. Roll bread tightly around the filling, sealing the edge.
4. Heat a skillet over medium heat.
5. Brush roll-ups with melted butter.
6. Place roll-ups seam-side down in the skillet and cook, turning, until golden and toasted on all sides.
7. Remove from skillet and immediately roll in cinnamon sugar.
8. Serve warm with powdered sugar or chocolate sauce if desired.
Notes
Work quickly so the marshmallows don’t melt before rolling.
Use Nutella or peanut butter cups for fun variations.
These roll-ups are best enjoyed fresh while warm and gooey.
- Prep Time: 10 minutes
- Cook Time: 10 minutes
- Category: Dessert
- Method: Stovetop
- Cuisine: American
- Diet: Vegetarian
Nutrition
- Serving Size: 1 roll-up
- Calories: 210
- Sugar: 18g
- Sodium: 160mg
- Fat: 9g
- Saturated Fat: 5g
- Unsaturated Fat: 3g
- Trans Fat: 0g
- Carbohydrates: 30g
- Fiber: 1g
- Protein: 3g
- Cholesterol: 20mg
Keywords: smores roll ups, easy smores dessert, quick sweet treat, marshmallow chocolate dessert
Why You’ll Love These S’mores Roll-Ups
A No-Mess Alternative to Traditional S’mores
Traditional s’mores are delicious but let’s be honest—they’re a beautiful mess. These roll-ups deliver all the flavor with half the cleanup. The tortilla acts as the perfect vessel, keeping the melty chocolate and marshmallow contained while adding a delightful crispy texture once pan-fried. I love that I can make these in my kitchen any time of year, regardless of weather. Plus, they’re incredibly kid-friendly! My little ones can help assemble them without the worry of open flames or sticky marshmallow residue ending up everywhere except their mouths.
Quick and Customizable for Any Occasion
One of the best things about S’mores Roll-Ups is how ridiculously fast they come together. From start to finish, you’re looking at less than 15 minutes—perfect for those sudden sweet tooth emergencies! The basic ingredients are simple: tortillas, chocolate, marshmallows, butter, and cinnamon sugar. But don’t stop there. You can easily customize with peanut butter, Nutella, different chocolate varieties, or even fruit additions. I’ve made these for impromptu movie nights, after-school treats, and they’ve even saved dessert at a dinner party when my planned soufflé failed spectacularly.
Essential Tips & Tricks
Getting the Perfect Melt
The secret to incredible S’mores Roll-Ups lies in the melting technique. I’ve found that medium-low heat is absolutely crucial—too high and your tortilla burns before the fillings melt; too low and everything gets soggy. Use a non-stick pan with a light coating of butter, and don’t rush the process! Give each roll-up about 2-3 minutes per side, gently pressing down with a spatula to ensure even contact with the pan. Watch for that golden-brown exterior and the first signs of chocolate beginning to ooze out—that’s your cue they’re ready to flip.
Sealing the Edges Properly
Nothing ruins the S’mores Roll-Ups experience like filling escaping mid-cook! The key is in how you seal those edges. After placing your fillings slightly off-center on the tortilla, fold in the sides first, then roll from bottom to top, tucking in as you go. For extra security, especially with larger tortillas, secure with toothpicks before cooking. Another trick I learned after a particularly messy batch: brush the edges with a bit of beaten egg as “glue” before rolling. This works similarly to how I seal the crust in my Gluten-Free Caramel Apple Tart with Almond Crust—creating a foolproof seal.
Serving Ideas & Creative Variations
Elevated Dessert Presentations
Transform these humble S’mores Roll-Ups into an impressive dessert with thoughtful presentation. Slice them diagonally and arrange on a platter with fresh berries and a dusting of powdered sugar. Or serve them whole with a scoop of vanilla ice cream and a drizzle of chocolate sauce for a deconstructed sundae experience. For dinner parties, I like to create a dessert board with different roll-up variations, similar to how I arrange my BBQ Chicken Totchos for appetizers—it’s always a conversation starter and lets guests mix and match flavors.
Breakfast and Brunch Adaptations
Who says s’mores are just for dessert? These roll-ups make a delightful breakfast treat with a few thoughtful tweaks. Try using whole wheat tortillas and dark chocolate for a slightly healthier spin, or add sliced bananas and a sprinkle of cinnamon for a breakfast-appropriate flavor. Serve alongside fresh fruit and coffee for a special weekend brunch. My kids absolutely adore “breakfast s’mores” on Saturday mornings—it’s become our little tradition. The beauty is they’re substantial enough to feel like a proper breakfast item while still delivering that sweet treat experience.
Storage & Troubleshooting Guide
Making Ahead and Proper Storage
S’mores Roll-Ups are best enjoyed fresh off the pan, but you can prep them in advance for quick cooking later. Assemble the roll-ups, wrap individually in parchment paper, and refrigerate for up to 24 hours. When ready to enjoy, simply cook as directed, adding an extra minute per side to account for the chilled ingredients. Leftover cooked roll-ups (if there are any!) can be stored in an airtight container at room temperature for up to 2 days. Reheat in a dry skillet for 1-2 minutes per side to restore that crispy exterior.
Fixing Common Mistakes
Even the simplest recipes can go sideways sometimes! If your chocolate isn’t melting properly, try chopping it finer before adding it to the tortilla. For marshmallows that refuse to get gooey, try cutting them in half or using mini marshmallows instead. If your roll-ups are browning too quickly before the filling melts, your heat is too high—immediately lower it and move the pan off the heat for 30 seconds before continuing. And for tortillas that crack during rolling, try warming them briefly in the microwave for 10 seconds to make them more pliable and flexible.
Frequently Asked Questions
Can I make S’mores Roll-Ups gluten-free?
Absolutely! Use certified gluten-free tortillas instead of regular ones. The rest of the ingredients are naturally gluten-free, making this an easy adaptation.
What’s the best chocolate to use for S’mores Roll-Ups?
Milk chocolate bars work best as they melt smoothly, but dark or semi-sweet chocolate chips are great alternatives for less sweetness.
Can I bake these instead of pan-frying?
Yes! Arrange on a baking sheet, brush with melted butter, and bake at 350°F for 8-10 minutes until golden and crisp.
How do I prevent the filling from leaking out?
Don’t overfill—use about 1 tablespoon each of chocolate and marshmallows per small tortilla and seal edges tightly before cooking.
Are S’mores Roll-Ups kid-friendly to make?
Kids love assembling these! Let them help with filling and rolling while adults handle the cooking portion for safety.
Final Thoughts
S’mores Roll-Ups have become my secret weapon for turning ordinary moments into something special without hours in the kitchen. There’s something magical about how these simple ingredients transform into such a delightful treat. Whether you’re craving campfire flavors in December, need a quick dessert for unexpected guests, or want to surprise your family with a creative twist on a classic, these roll-ups deliver every time. The combination of crispy tortilla, melty chocolate, and gooey marshmallow is simply irresistible. Find more inspiration for sweet treats on my Pinterest page.