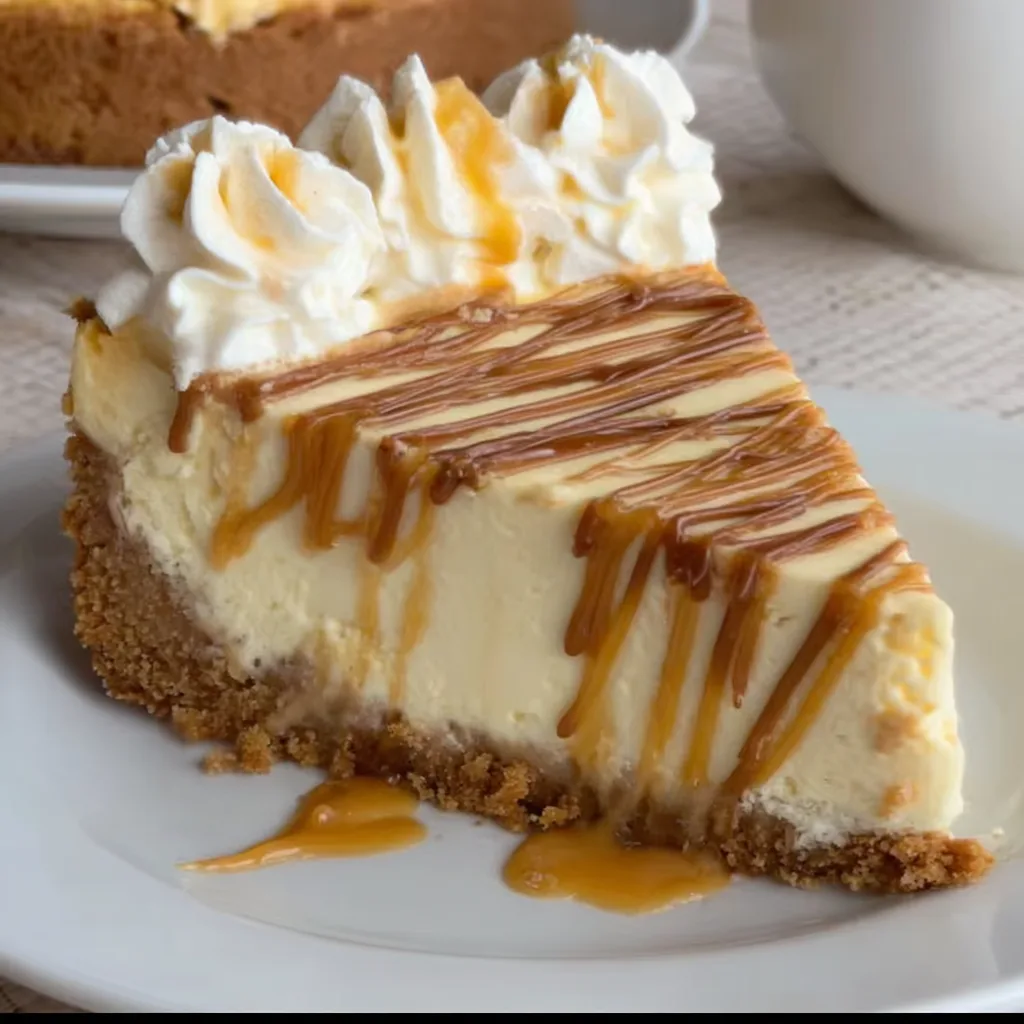
This White Chocolate Peanut Butter Cheesecake is pure decadence in every bite—a velvety dream that combines two of life’s greatest pleasures. I first created this recipe during a snowy weekend when nothing but something rich and comforting would do. The buttery graham cracker crust cradles a silky-smooth peanut butter filling, while melted white chocolate adds a luxurious sweetness that balances the nutty flavor perfectly. As it chilled in my refrigerator, the heavenly aroma filled my kitchen, making the wait almost unbearable. Trust me when I say this showstopper dessert will have everyone asking for seconds—and your recipe! It’s indulgent enough for special occasions but simple enough to make whenever that cheesecake craving hits.
Table of Contents
Recipe
Print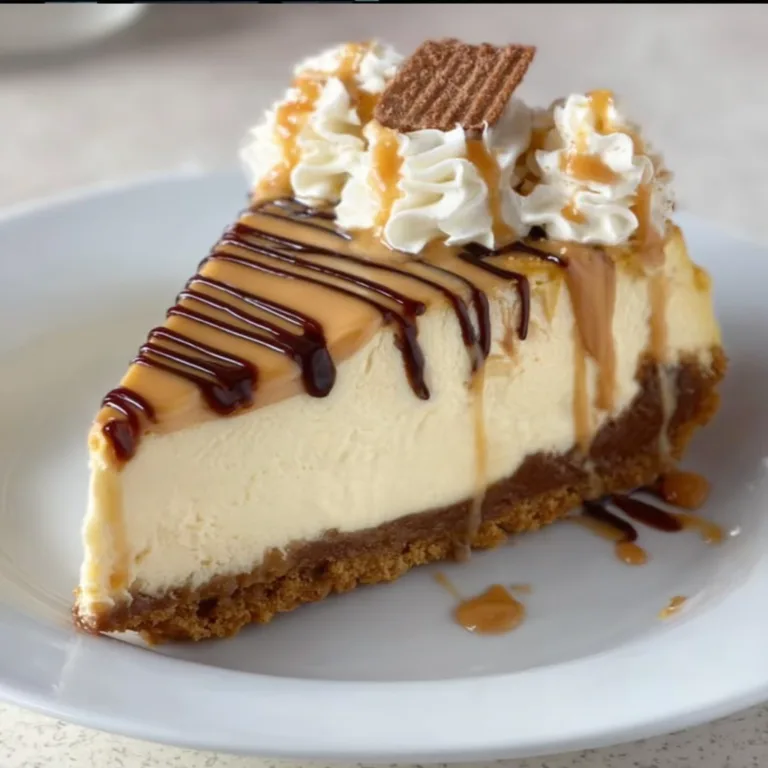
Decadent White Chocolate Peanut Butter Cheesecake Recipe | Creamy & Irresistible Dessert
This white chocolate peanut butter cheesecake is pure indulgence. With a buttery cookie crust, ultra-creamy filling made with real peanut butter and melted white chocolate, and a silky whipped topping—this dessert is rich, dreamy, and always a crowd favorite. It’s the ultimate treat for any peanut butter lover!
- Total Time: 6 hours (includes chilling)
- Yield: 12 slices 1x
Ingredients
For the Crust:
1 1/2 cups crushed graham crackers or peanut butter cookies
1/4 cup granulated sugar
1/3 cup melted butter
For the Filling:
3 (8 oz) packages cream cheese, softened
1 cup creamy peanut butter
1/2 cup granulated sugar
1 tsp vanilla extract
3 large eggs
1/2 cup sour cream
6 oz white chocolate, melted and slightly cooled
For the Topping:
1/2 cup heavy whipping cream
1 tbsp powdered sugar
1/4 cup white chocolate curls or chopped peanuts (optional)
Instructions
1. Preheat oven to 325°F (160°C). Grease a 9-inch springform pan.
2. Mix crushed graham crackers, sugar, and melted butter. Press into bottom of pan. Bake crust for 8 minutes. Let cool slightly.
3. In a large bowl, beat cream cheese until smooth. Add peanut butter, sugar, and vanilla; beat until combined.
4. Beat in eggs one at a time, then mix in sour cream and melted white chocolate.
5. Pour batter into crust and smooth the top.
6. Bake for 55–65 minutes, until center is just set. Turn off oven, crack the door, and let cheesecake cool for 1 hour.
7. Refrigerate at least 4 hours or overnight.
8. Whip cream and powdered sugar to stiff peaks. Spread on chilled cheesecake. Garnish with white chocolate curls or peanuts.
Notes
• For extra indulgence, drizzle melted peanut butter or white chocolate on top before serving.
• Use a water bath while baking for an ultra-smooth texture.
• Store in fridge up to 5 days; freeze slices for longer storage.
- Prep Time: 20 minutes
- Cook Time: 1 hour
- Category: Dessert, Cheesecake
- Method: Baking
- Cuisine: American
- Diet: Vegetarian
Nutrition
- Serving Size: 1 slice
- Calories: 490
- Sugar: 28g
- Sodium: 280mg
- Fat: 36g
- Saturated Fat: 18g
- Unsaturated Fat: 15g
- Trans Fat: 0g
- Carbohydrates: 34g
- Fiber: 1g
- Protein: 9g
- Cholesterol: 115mg
Keywords: white chocolate peanut butter cheesecake, creamy peanut butter dessert, indulgent cheesecake recipe, baked cheesecake with white chocolate
Why You’ll Love This White Chocolate Peanut Butter Cheesecake
Perfect Balance of Flavors and Textures
This cheesecake hits all the right notes with its harmonious blend of sweet and salty. The creamy peanut butter brings a nutty richness that perfectly complements the delicate sweetness of white chocolate. I love how the graham cracker crust adds a wonderful textural contrast with its slight crunch against the silky-smooth filling. Each forkful delivers that perfect balance—not too sweet, not too heavy. The first time I served this at a dinner party, my friend closed her eyes and sighed with pure joy after her first bite. That’s the magic of this dessert—it creates moments of pure bliss around your table.
Impressive Yet Achievable
Don’t let the elegant appearance fool you—this showstopper is surprisingly manageable to make. The ingredient list isn’t intimidating, and the steps flow logically without any complicated techniques. Even if you’re new to cheesecake baking, my detailed instructions will guide you through each stage. The water bath might seem fancy, but it’s actually a simple step that ensures that perfectly smooth, crack-free top. I still remember my first attempt—I was nervous but amazed at how professional it looked when finished. Your guests will think you spent hours laboring over this dessert, and I won’t tell them otherwise!
Essential Tips & Tricks
Perfecting Your Cheesecake Texture
The secret to that dreamy, silky texture lies in a few critical techniques. Always bring your cream cheese to room temperature before mixing—cold cream cheese leads to lumps that never fully incorporate. Beat the cream cheese alone first until completely smooth before adding other ingredients. When adding eggs, mix on low speed just until combined; overbeating incorporates too much air, causing cracks. The water bath is non-negotiable—it creates gentle, even heat that prevents the dreaded crack on top. I learned this the hard way after my first cheesecake looked like the Grand Canyon! Check out my Snickerdoodle Cheesecake for more cheesecake mastery tips.
Choosing Quality Ingredients
This is a dessert where ingredient quality truly matters. Use full-fat cream cheese (never reduced-fat versions) for the proper texture and flavor depth. Choose a high-quality, creamy peanut butter—I prefer the traditional kind rather than natural varieties that can separate. For the white chocolate, select real white chocolate (with cocoa butter) rather than white baking chips, which don’t melt as smoothly. Splurge on pure vanilla extract instead of imitation. I once tried making this with bargain ingredients, and while still good, it lacked that luxurious mouthfeel that makes this cheesecake truly special. The difference is noticeable in every velvety bite.
Serving Ideas & Creative Variations
Elegant Presentation Options
Transform this already stunning dessert into a true showstopper centerpiece with thoughtful presentation. A light dusting of cocoa powder creates beautiful contrast against the creamy surface. For special occasions, arrange chocolate-dipped strawberries around the edge or create chocolate curls for the top using a vegetable peeler against a chocolate bar. Serve each slice on a chilled plate with a swirl of chocolate sauce and a tiny dollop of whipped cream. I love adding edible gold dust for holiday gatherings—it catches the light beautifully and makes everyone feel special. For more dessert presentation inspiration, check out my Easy Frosted Texas Brownies for simple but effective decorating ideas.
Delicious Flavor Twists
While the classic recipe is divine, don’t be afraid to experiment with flavor variations. Swirl raspberry preserves through the batter before baking for a fruity contrast. Add crushed Oreos to the crust or fold mini chocolate chips into the filling for extra texture. For a holiday version, incorporate a teaspoon of cinnamon and a dash of nutmeg into the batter. My personal favorite twist is adding a tablespoon of espresso powder—it enhances the chocolate notes without tasting like coffee. Another crowd-pleaser is replacing the graham crackers with gingersnaps for a spicy-sweet foundation that complements the creamy filling beautifully.
Storage & Troubleshooting Guide
Proper Storage for Maximum Freshness
To maintain that perfect creamy texture, proper storage is essential. Always cool your cheesecake completely at room temperature before refrigerating. Cover loosely with plastic wrap once cooled—pressing wrap directly against the surface prevents condensation from forming. This cheesecake keeps beautifully for up to 5 days refrigerated, though the crust may soften slightly over time. For longer storage, freeze individual slices wrapped in plastic and foil for up to 2 months. When ready to enjoy, thaw in the refrigerator overnight rather than at room temperature for the best texture. I often make this dessert days before a gathering—it’s one less thing to worry about and tastes even better after the flavors have had time to meld.
Solving Common Cheesecake Problems
Even experienced bakers encounter issues, but most cheesecake problems have simple solutions. If your cheesecake cracks, don’t panic—a beautiful topping of whipped cream or white chocolate ganache covers imperfections perfectly. Sunken centers usually indicate underbaking; next time, add a few more minutes to your bake time. A soggy crust typically means water leaked into your foil wrap—use heavy-duty foil and double or triple wrap for insurance. If your filling seems too runny, refrigerate it for 30 minutes before pouring into the crust. I once had a cheesecake that wouldn’t set properly—placing it in the freezer for an hour saved the day and no one knew the difference!
Frequently Asked Questions
Can I make this White Chocolate Peanut Butter Cheesecake without a water bath?
While possible, I don’t recommend it. The water bath ensures even cooking and prevents cracks by maintaining humidity. If you must skip it, bake at 325°F instead and accept some surface imperfections.
How do I prevent my cheesecake from cracking?
Avoid overmixing the batter, use a water bath, and cool gradually. Turn off the oven when done, open the door slightly, and let the cheesecake cool inside for an hour before removing.
Can I use natural peanut butter in this recipe?
Traditional peanut butter works best as natural varieties can separate and affect texture. If using natural, stir thoroughly and consider adding an extra tablespoon of flour to stabilize the filling.
How far in advance can I make this cheesecake?
This cheesecake can be made up to 3 days ahead and refrigerated, or frozen for up to 2 months. The flavors actually improve after 24 hours of chilling.
Can I substitute dark chocolate for the white chocolate?
Absolutely! Dark chocolate creates a more intense flavor profile. Reduce the sugar by 2 tablespoons to balance the sweetness and follow the same melting instructions.
Final Thoughts
This White Chocolate Peanut Butter Cheesecake has become my signature dessert for good reason. There’s something magical about the way these flavors come together—sophisticated enough for special occasions yet comforting enough for everyday indulgence. I love watching people’s faces light up with that first creamy bite, knowing I’ve created something truly memorable. Whether you’re a seasoned baker or trying your first cheesecake, this recipe delivers impressive results that will have everyone thinking you’re a pastry chef. For more inspiration, follow my dessert collection on Pinterest where I’m always adding new favorites!