
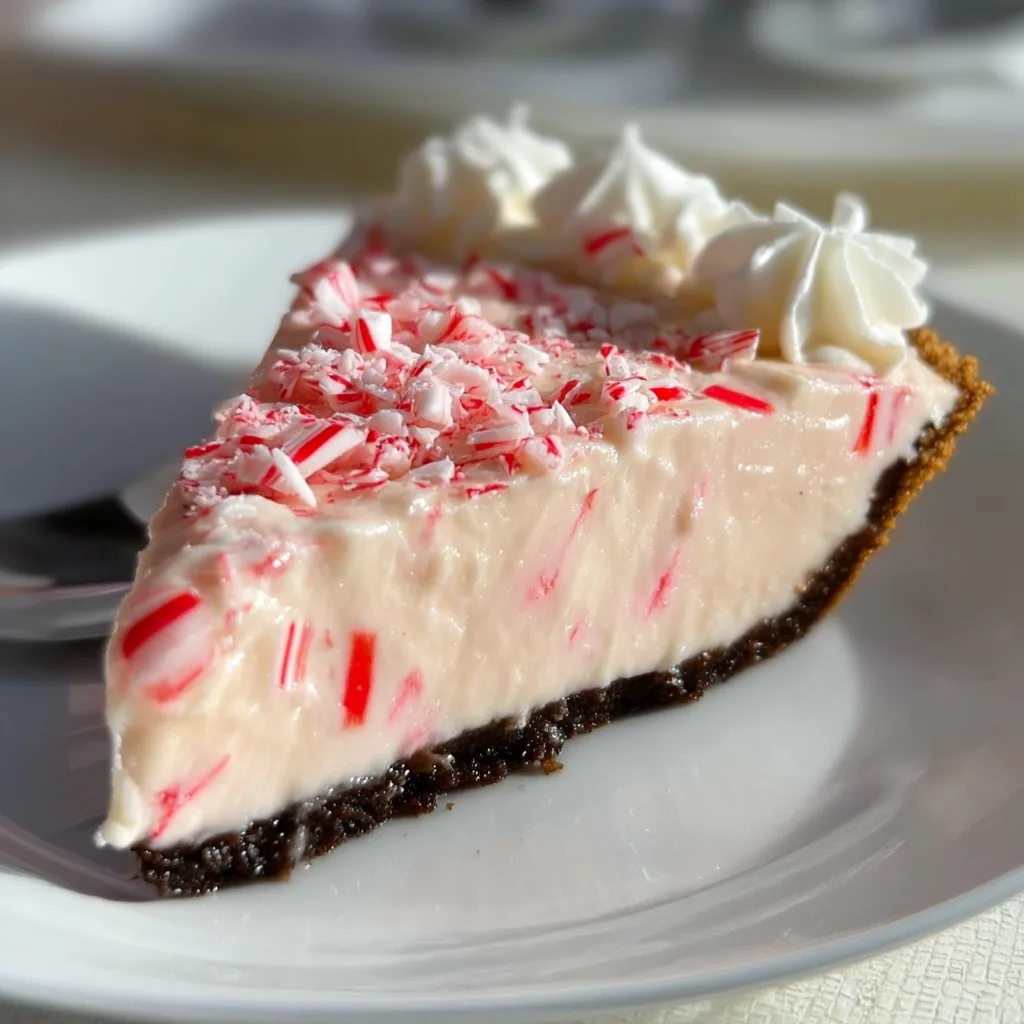
Candy Cane Pie brings all the magic of the holiday season to your dessert table. The moment I first created this minty marvel, my kitchen filled with that unmistakable peppermint aroma that instantly transports you to a winter wonderland. The creamy white chocolate filling paired with the crunchy candy cane bits creates a texture contrast that’s absolutely divine. I love watching guests’ eyes light up when they take their first bite – that perfect balance of sweetness with a cool mint finish. This no-bake wonder has become my go-to holiday showstopper, and I can’t wait to share how easy it is for you to recreate this festive delight in your own kitchen!
Table of Contents
Recipe
Print
Delicious Candy Cane Pie Recipe – Perfect Holiday Dessert Treat
This no-bake candy cane pie is a creamy, pepperminty holiday dream! With a chocolate cookie crust, fluffy pink peppermint filling, and crushed candy cane topping, it’s festive, fun, and incredibly easy to make. Perfect for Christmas gatherings, cookie swaps, or a cozy winter dessert!
- Total Time: 4 hours 15 minutes (includes chilling)
- Yield: 8 slices 1x
Ingredients
1 (9-inch) chocolate cookie pie crust
1 (8 oz) package cream cheese, softened
1/2 cup powdered sugar
1/2 tsp peppermint extract
A few drops red or pink food coloring (optional)
1 1/2 cups whipped topping (like Cool Whip), thawed
1/2 cup crushed candy canes (plus extra for topping)
Optional: chocolate shavings or white chocolate drizzle
Instructions
1. In a large bowl, beat cream cheese until smooth and creamy.
2. Add powdered sugar, peppermint extract, and food coloring. Mix until well combined and light pink.
3. Fold in whipped topping gently until fully combined.
4. Stir in crushed candy canes.
5. Spoon the filling into the prepared cookie crust and smooth the top.
6. Refrigerate for at least 4 hours or until firm.
7. Top with extra crushed candy canes and optional chocolate before serving.
Notes
• Use a homemade Oreo crust for extra richness.
• Swap peppermint extract with mint extract for a milder flavor.
• Pie can be made a day ahead—store covered in fridge until ready to serve.
- Prep Time: 15 minutes
- Cook Time: 0 minutes
- Category: Dessert, Holiday
- Method: No-Bake, Chilling
- Cuisine: American
- Diet: Vegetarian
Nutrition
- Serving Size: 1 slice
- Calories: 290
- Sugar: 24g
- Sodium: 190mg
- Fat: 17g
- Saturated Fat: 9g
- Unsaturated Fat: 6g
- Trans Fat: 0g
- Carbohydrates: 30g
- Fiber: 0g
- Protein: 2g
- Cholesterol: 30mg
Keywords: candy cane pie recipe, no-bake peppermint pie, holiday dessert, Christmas cream pie
Why You’ll Love This Candy Cane Pie
A Perfect Holiday Showstopper
This pie is a visual stunner that demands attention on any holiday table. The striking red and white candy cane pieces scattered across the creamy white surface create a festive masterpiece that looks professionally made. I remember serving this at last year’s neighborhood gathering, and before anyone even tasted it, phones were out capturing its beauty! The contrast between the dark chocolate cookie crust and the bright filling makes for an irresistible presentation. Best of all, it comes together with minimal effort but delivers maximum impact – exactly what we need during the busy holiday season.
Balanced Flavor Profile
The beauty of this Candy Cane Pie lies in its perfectly balanced flavors. The cool peppermint doesn’t overwhelm but rather complements the rich white chocolate filling. Each bite delivers a harmonious blend of creamy sweetness with that refreshing mint finish that makes your taste buds dance. I’ve carefully calibrated the peppermint extract to provide just enough coolness without venturing into toothpaste territory! The chocolate cookie crust adds a wonderful depth that grounds all those bright flavors. Even guests who claim not to love mint desserts have been converted after trying this perfectly balanced treat.
Essential Tips & Tricks
Mastering the Perfect Texture
Creating the silky-smooth filling requires attention to a few key details. Always use room temperature cream cheese to avoid those pesky lumps that can ruin your texture. When melting the white chocolate, use gentle heat and stir constantly – white chocolate burns easily and becomes grainy. I learned this the hard way during my first attempt! For the ultimate creamy consistency, fold in your whipped cream rather than beating it in. This gentle incorporation maintains those beautiful air bubbles that give your pie its luxurious mouthfeel. Trust me, these small steps make all the difference in achieving that professional bakery-quality texture.
Candy Cane Crushing Techniques
The way you crush your candy canes dramatically affects both the appearance and eating experience of your pie. For the prettiest presentation, use a combination of fine powder and larger pieces. Place candy canes in a ziplock bag and use a rolling pin with varying pressure – gentle taps create larger decorative pieces, while firm rolling creates the fine powder that infuses flavor throughout. Sprinkle some pieces directly into the filling and save the prettiest bits for the top. For an extra-special touch like I do in my Snickerdoodle Cobbler, crush a few candy canes just before serving to maintain their bright color and prevent them from dissolving.
Serving Ideas & Creative Variations
Festive Presentation Upgrades
Take your Candy Cane Pie from delicious to dazzling with a few simple presentation enhancements. Create a stunning garnish by placing whole mini candy canes around the perimeter or forming a starburst pattern on top. For an elegant touch, dust the edges with a light shimmer of edible silver powder. I love serving individual slices on plates drizzled with chocolate sauce in a decorative pattern. For a truly show-stopping presentation, similar to my Burnt Honey Pie, place the pie on a cake stand surrounded by fresh pine sprigs and cranberries for a gorgeous holiday centerpiece that smells as festive as it looks.
Flavor Twist Opportunities
While the classic version is divine, don’t be afraid to experiment with delicious variations. For chocolate lovers, try a dark chocolate drizzle over the top or fold chocolate chips into the filling. Create a mocha version by adding 2 teaspoons of espresso powder to the crust mixture. For a boozy adult twist, incorporate 2 tablespoons of peppermint schnapps into the filling. My personal favorite variation includes a layer of raspberry preserves between the crust and filling – the tartness perfectly complements the sweet mint. You can also explore different crusts, like a graham cracker or gingersnap base for an interesting flavor contrast.
Storage & Troubleshooting Guide
Optimal Storage Methods
To maintain your pie’s perfect texture and flavor, proper storage is essential. Cover loosely with plastic wrap rather than aluminum foil, which can damage the decorative top. Store in the refrigerator for up to 3 days – any longer and the candy cane pieces may begin to dissolve and bleed color into the filling. If you need to make it further ahead, freeze the pie without the candy cane topping, then thaw in the refrigerator overnight and add fresh candy pieces before serving. I’ve found that placing it at the back of the refrigerator keeps it at the most consistent temperature.
Common Issues & Solutions
Even experienced bakers encounter challenges! If your filling isn’t setting properly, it’s likely due to under-whipping the cream or using cream cheese that’s too warm. Fix this by returning the pie to the refrigerator for an additional 2-3 hours. If candy canes begin to “weep” and create color streaks, simply embrace the marbled effect as a design feature! For cracks in the surface, create a decorative topping with whipped cream rosettes to cover any imperfections. If your crust crumbles when slicing, try chilling the pie for 15 minutes in the freezer right before serving for cleaner cuts.
Frequently Asked Questions
Can I make Candy Cane Pie ahead of time?
Yes! Prepare it up to 2 days in advance, but add the candy cane topping just a few hours before serving to prevent color bleeding and maintain crunchiness.
Is there a way to make this pie without white chocolate?
Absolutely. Substitute the white chocolate with 8 ounces of melted marshmallows for a different but equally delicious base with similar texture.
Can I use peppermint candies instead of candy canes?
Yes! Regular peppermint candies work perfectly and often provide more consistent color than candy canes with varied patterns.
How do I prevent my Candy Cane Pie filling from being too soft?
Ensure your heavy cream is very cold before whipping and allow the white chocolate to cool completely before incorporating it into the filling.
Can I make this pie gluten-free?
Definitely! Simply substitute the cookie crust with gluten-free cookies or a gluten-free graham cracker crust for an equally delicious result.
Final Thoughts
This Candy Cane Pie has become more than just a dessert in my home—it’s a holiday tradition that signals the season has truly arrived. The perfect balance of creamy, cool, and crunchy elements creates a dessert that appeals to everyone at your table. I love how it brings together classic holiday flavors in an unexpected way, creating something both nostalgic and fresh. Whether you’re serving it at a grand holiday gathering or enjoying a quiet slice with a cup of hot cocoa, this pie delivers pure joy in every bite. Find more seasonal inspiration on my Pinterest page and make this Candy Cane Pie the star of your holiday celebrations!